Modeller
41.880 kayıt← durum paneline dön · ★ Favoriler (102) · ⚑ Raporlar (108) · görseli indirilmiş 41880 model gösteriliyor

















diy-watch-club
USD Welcome to the DIY Watch Assembly Instruction
In the next two hours, you will dive into the world of watchmaking.Please relax, take your time, and enjoy the fun of the craft of watchmaking!
Master Aviator Series Assembly Instructions
Before starting, you can familiarize yourself with the tools and parts needed:
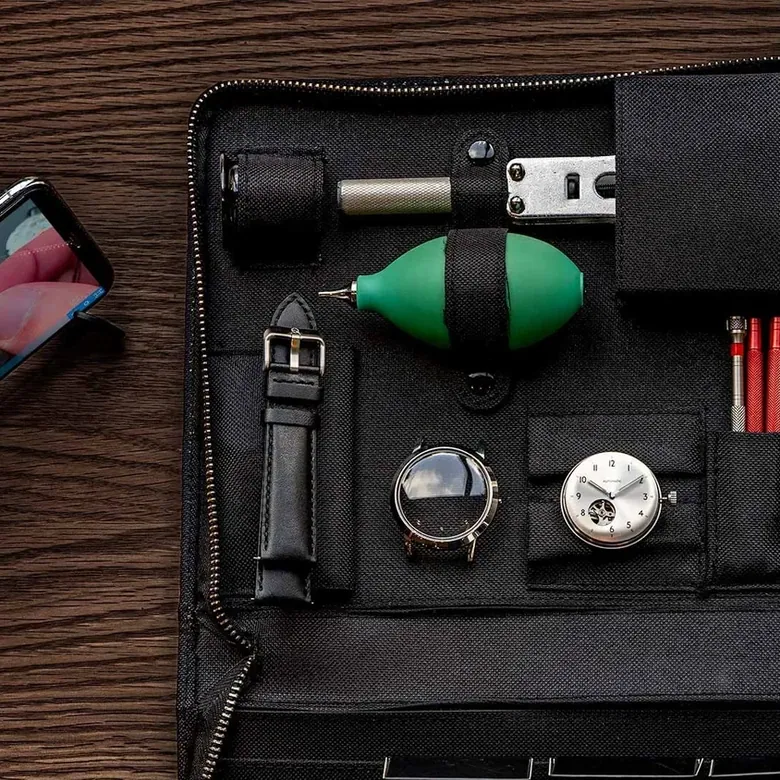
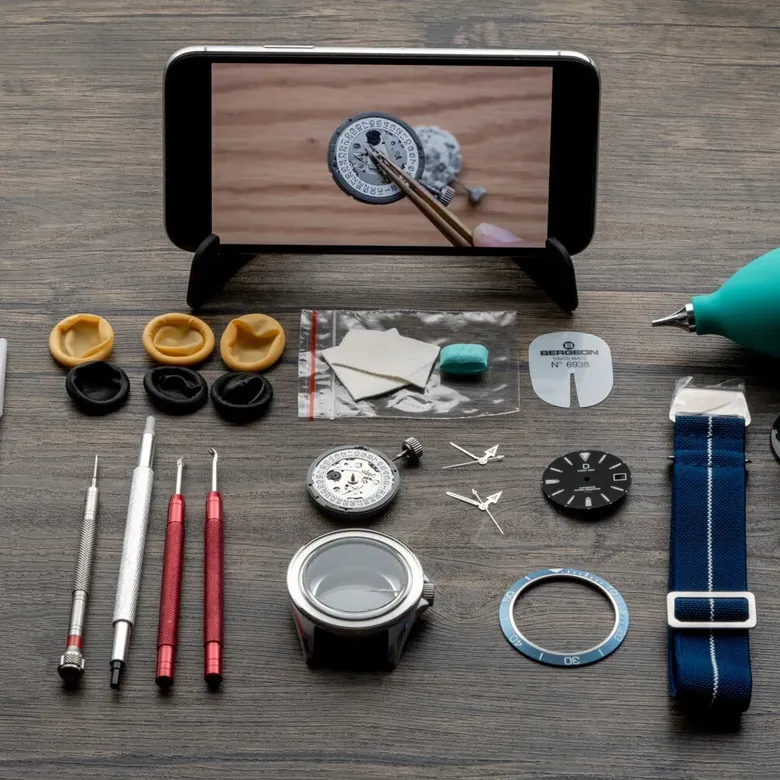
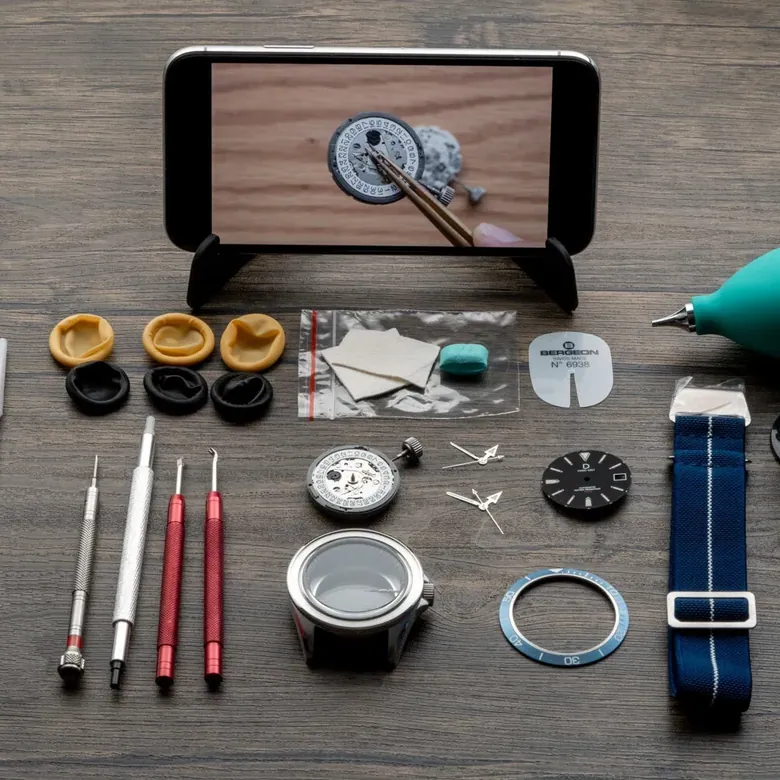
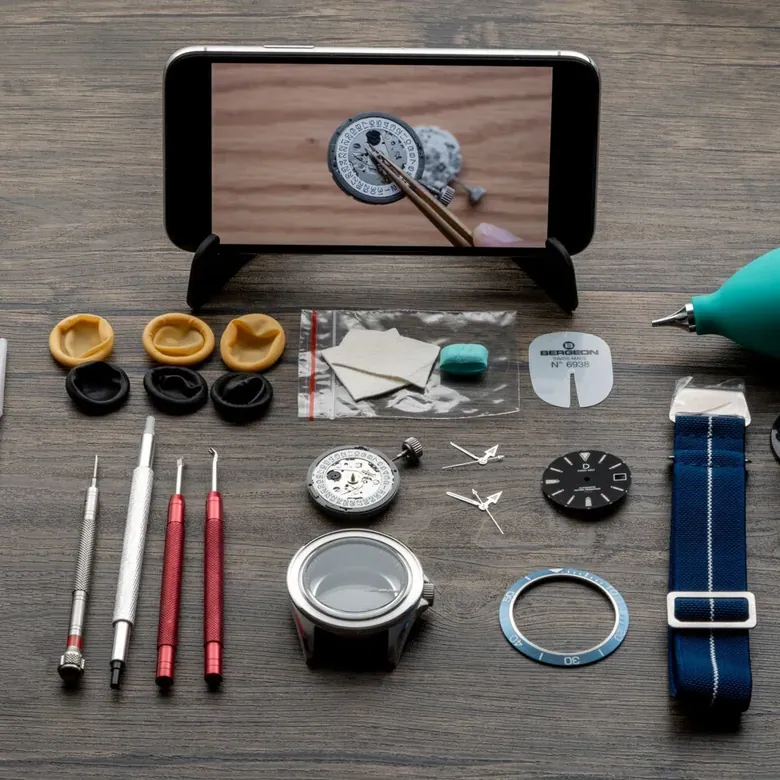
Parts:watch casebezel insertcrown and stemmovement holderchapter ringdialhandsmovementgasketstrapquick release spring bars (optional depending on strap type)
Tools:tweezersfinger cotshand pumpsuedeRodicoloupecase openerhand removal toolsprotective film for hand removalhand setting toolpeg woodscrewdriver
1: Dial and Movement Assembly Installation
Introduction: how to use mechanical watches with dateThis is a brief introduction to the basics of a mechanical watch with date function, which might prove useful in your subsequent installation. If you are already familiar with how a mechanical watch works, feel free to skip this video and proceed to the next one.Content:crown position for setting datewhen to avoid setting datehow to determine AM/PM
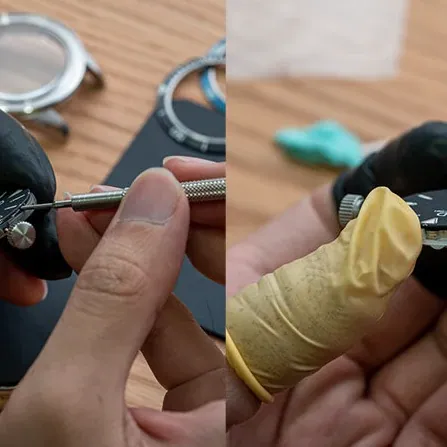
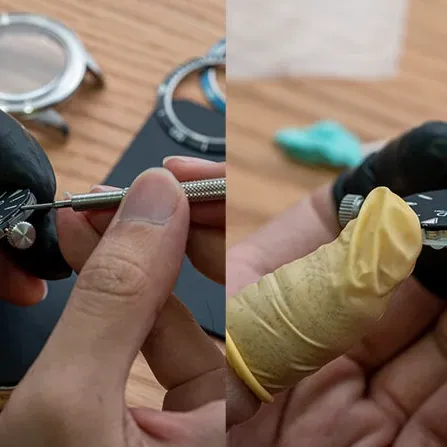
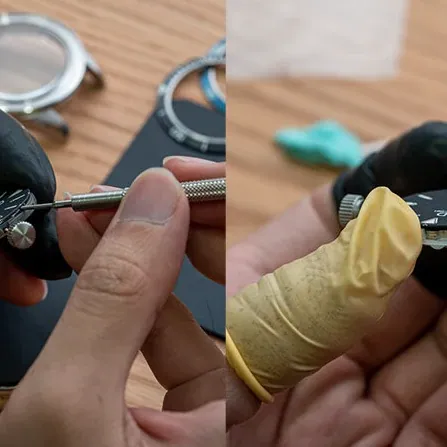
1a. Opening the package and wearing finger cotsIntroduction to what’s inside the package, and how to wear finger cots to protect the movement.Content:introduce package contenthow to wear finger cots, and why
1b. Preparing case partsYour watch case comes pre-assembled in order to keep it clean. This part will show you the individual parts of a case.Content:How to open case backHow to place parts
1c. Precautions during movement installation and movement introductionMechanical movement is the soul of a watch. It takes great care to install it. In this part, we’ll show you what to be mindful of when you install the movement. We’ll also introduce what makes a Swiss movement different.Content:Introduction of different parts of a movementAreas you should not touchAreas you can apply pressure on
Warning regarding hand winding on SW200
Sellita recommends the use of hand winding to be limited only to start the movement to preserve the longevity of the rachet wheel.
Therefore use hand winding to start the movement, then use the automatic rotor to wind up the movement to full wind.
1d. Removal and installation of stem and crownWatch assembly and basic watch repair require you to install and remove the stem and crown. You will need to do this multiple times throughout this workshop.Content:Function of crownWhat to avoid in stem removal for SW200How to remove and install crown
1e. Installing movement holder and dialIn this part, we will install the dial. After assembling them, we will proceed to the next part, where we install the watch hands.Content:Install the movement into the movement holderInstall dial onto the movement holder
Optional: How to remove the dial
View fullsize
To remove the dial, simply use a screw driver, and insert it in between the dial and the movement or movement holder. Inserting the screw driver next to the dial feet will give you a better control.
2: Hand Installation and Adjustment
If this is your first time installing hands, it might be quite difficult. You can take a break first before continuing.
Hand installation instruction
back to top
3: Installing Case and Other Parts
3a. Cleaning parts and movement assemblyInstruction on how to clean parts and movement assemblyContent:Using hand pumpUsing rodicoUsing peg wood
3b. Cleaning watch caseIn this part, we will clean the watch caseContent:Avoid touching the inside of caseUsing rodico, peg wood, and suede for cleaning
3c. Installing watch caseIn this part, we will install the movement assembly with hands into the caseContent:Installing assemblyAligning movement and stemInstalling case back
If you need to reinstall any of the components, you can refer to this:
case removal instruction
FINAL CHECK!
Check for proper watch functions by winding and setting time. When hands are being turned, check if they come into contact with other hands or parts.Check for dust or dirt on crystal, hands, dial or other parts. If needed, you can remove the case to clean the inside.Check if the case back is securely fastened. If not, water resistance capability of the watch might be compromised.
Almost there!Good job! You are now one step away from your DIY watch!
Proceed to final instruction
40 mm · Otomatik
diy-watch-club
USD Instructions for Case RemovalIf you want to redo a certain step, depending on the need, you need to carry out:Case removalHand removalDial removal
1. Case removalTo access the movement assembly, you have to remove the case first.Content:Learn how to remove the case safely
2. Hand removalBefore removing the dial, you need to remove the hands first.Content:learn how to remove the hands with the hand removal tool
3. Dial removalTo remove the dial, simply use a screw driver, and insert it in between the dial and the movement or movement holder. Inserting the screw driver next to the dial feet will give you a better control.
42 mm
diy-watch-club
USD Instructions for Case RemovalIf you want to redo a certain step, depending on the need, you need to carry out:Case removalHand removalDial removal
1. Case removalTo access the movement assembly, you have to remove the case first.Content:Learn how to remove the case safely
2. Hand removalBefore removing the dial, you need to remove the hands first.Content:learn how to remove the hands with the hand removal tool
3. Dial removalTo remove the dial, please follow the instruction at 2:51 of the video.
39 mm
diy-watch-club
USD Welcome to the DIY Watch Assembly Instruction
In the next two hours, you will dive into the world of watchmaking.Please relax, take your time, and enjoy the fun of the craft of watchmaking!
Chronograph Assembly Instructions
Before starting, you can familiarize yourself with the tools and parts needed:
Parts:watch casebezel insertcrown and stemmovement holderchapter ringdialhandsmovementgasketstrapMetal contacts for chronograph buttonsquick release spring bars (optional depending on strap type)
Tools:tweezersfinger cotshand pumpsuedeRodicoloupecase openerhand removal toolsprotective film for hand removalhand setting toolpeg woodscrewdriver
1: Dial and Movement Assembly Installation
1a. Opening the package and wearing finger cotsIntroduction to what’s inside the package, and how to wear finger cots to protect the movement.Content:introduce package contenthow to wear finger cots, and why
1b. Preparing case partsYour watch case comes pre-assembled in order to keep it clean. This part will show you the individual parts of a case.Content:How to open case backHow to place parts
1c. Precautions during movement installationThe movement is the soul of a watch. It takes great care to install it. In this part, we’ll show you what to be mindful of when you install the movement. Content:Introduction of a meca-quartz movementAreas you should not touchAreas you can apply pressure on
1d. Installation and removal of stem and crownWatch assembly and basic watch repair require you to install and remove the stem and crown. You will need to do this multiple times throughout this workshop.Content:Function of crownHow to remove and install crown
1e. Installing dialIn this part, we will install the dial. After assembling them, we will proceed to the next part, where we install the watch hands.Content:Install dial onto the movement
Optional: How to remove the dial
View fullsize
To remove the dial, simply use a screw driver, and insert it in between the dial and the movement or movement holder. Inserting the screw driver next to the dial feet will give you a better control.
1f. Installing movement holderIn this part, we will install the movement holder onto the movement assembly.Content:How to install the movement holder
2: Hand Installation and Adjustment
If this is your first time installing hands, it might be quite difficult. You can take a break first before continuing.
Hand installation instruction
back to top
3: Installing Case and Other Parts
3a. Cleaning parts and movement assemblyInstruction on how to clean parts and movement assemblyContent:Using hand pumpUsing rodicoUsing peg wood
3b. Cleaning watch caseIn this part, we will clean the watch caseContent:Avoid touching the inside of caseUsing rodico, peg wood, and suede for cleaning
3c. Installing watch caseIn this part, we will install the movement assembly with hands into the caseContent:Installing assemblyAligning movement and stemInstalling case back
If you need to reinstall any of the components, you can refer to this:
case removal instruction
FINAL CHECK!
Check for proper watch functions by winding and setting time. When hands are being turned, check if they come into contact with other hands or parts.Check for dust or dirt on crystal, hands, dial or other parts. If needed, you can remove the case to clean the inside.Check if the case back is securely fastened. If not, water resistance capability of the watch might be compromised.
Almost there!Good job! You are now one step away from your DIY watch!
Proceed to final instruction
40 mm · Kuvars
diy-watch-club
USD Welcome to the DIY Watch Assembly Instruction
In the next two hours, you will dive into the world of watchmaking.Please relax, take your time, and enjoy the fun of the craft of watchmaking!
Destro Diver (LHD) Assembly Instructions
Before starting, you can familiarize yourself with the tools and parts needed:
Parts:watch casebezel insertcrown and stemmovement holderchapter ringdialhandsmovementgasketstrapquick release spring bars (optional depending on strap type)
Tools:tweezersfinger cotshand pumpsuedeRodicoloupecase openerhand removal toolsprotective film for hand removalhand setting toolpeg woodscrewdriver
1: Dial and Movement Assembly Installation
Introduction: how to use mechanical watches with dateThis is a brief introduction to the basics of a mechanical watch with date function, which might prove useful in your subsequent installation. If you are already familiar with how a mechanical watch works, feel free to skip this video and proceed to the next one.Content:crown position for setting datewhen to avoid setting datehow to determine AM/PM
1a. Opening the package and wearing finger cotsIntroduction to what’s inside the package, and how to wear finger cots to protect the movement.Content:introduce package contenthow to wear finger cots, and why
1b. Preparing case partsYour watch case comes pre-assembled in order to keep it clean. This part will show you the individual parts of a case.Content:How to open case backHow to place parts
1c. Precautions during movement installationMechanical movement is the soul of a watch. It takes great care to install it. In this part, we’ll show you what to be mindful of when you install the movement. Content:Introduction of different parts of a movementAreas you should not touchAreas you can apply pressure on
1d. Removal and installation of stem and crownWatch assembly and basic watch repair require you to install and remove the stem and crown. You will need to do this multiple times throughout this workshop.Content:Function of crownHow to remove and install crown
1e. Installing dialIn this part, we will install the dial. After assembling them, we will proceed to the next part, where we install the watch hands.
Content:Install dial onto the movementThe following pictures indicate the movement dial holes (green spot):
View fullsize
NH35 movement
NH70 & NH72 movement
Optional: How to remove the dial
View fullsize
To remove the dial, simply use a screw driver, and insert it in between the dial and the movement or movement holder. Inserting the screw driver next to the dial feet will give you a better control. For Seiko NH movements, you can find slots on the movement holder for this purpose.
1f. Installing movement holderIn this part, we will install the movement holder onto the movement assembly.Content:How to install the movement holder
2: Hand Installation and Adjustment
Important note for Destro Watch (LHD) DialsTo align the watch hands correctly, please make sure that your crown is on the left-hand side when you align and install the watch hands.
If this is your first time installing hands, it might be quite difficult. You can take a break first before continuing.
Hand installation instruction
back to top
3: Installing Case and Other Parts
[Optional] Bleaching bezel insert
Before installing your case, you can opt to give your bezel insert a faded look by carrying out a process called “bleaching”. Learn how to do it via the button below:
Try bleaching
3a. Cleaning parts and movement assemblyInstruction on how to clean parts and movement assemblyContent:Using hand pumpUsing rodicoUsing peg wood
3b. Cleaning watch caseIn this part, we will clean the watch caseContent:Avoid touching the inside of caseUsing rodico, peg wood, and suede for cleaning
3c. Installing chapter ring and watch case
In this part, we will install the movement assembly with hands into the case. For Destro / LHD watches, you can consider rotating the assembly by 180 degree and then follow our instructions. Whether you are left-handed or not, if you have experience working with watches, you will most likely be used to manipulating watch components with crowns on the 3 o’clock.
Content:Installing assemblyAligning movement and stemInstalling case back
3d. (optional) Installing custom rotorIf you have customised a rotor, replace the factory default rotor with your custom rotor.Content:Finding the right screwdriverRemoving the rotorPutting on the new rotorFor Seiko rotor:
3e. (optional) switching bezels
If you need to reinstall any of the components, you can refer to this:
case removal instruction
FINAL CHECK!
Check for proper watch functions by winding and setting time. When hands are being turned, check if they come into contact with other hands or parts.Check for dust or dirt on crystal, hands, dial or other parts. If needed, you can remove the case to clean the inside.Check if the case back is securely fastened. If not, water resistance capability of the watch might be compromised.
Almost there!Good job! You are now one step away from your DIY watch!
Proceed to final instruction
39 mm · Otomatik
diy-watch-club
USD DIYウォッチ組立のご案内へようこそ
これからの2時間、時計づくりの世界にじっくりと入り込んでいただきます。どうぞゆっくりと、時計づくりの楽しさを味わってください!
ダイバーズウォッチ 40mm 組立説明書
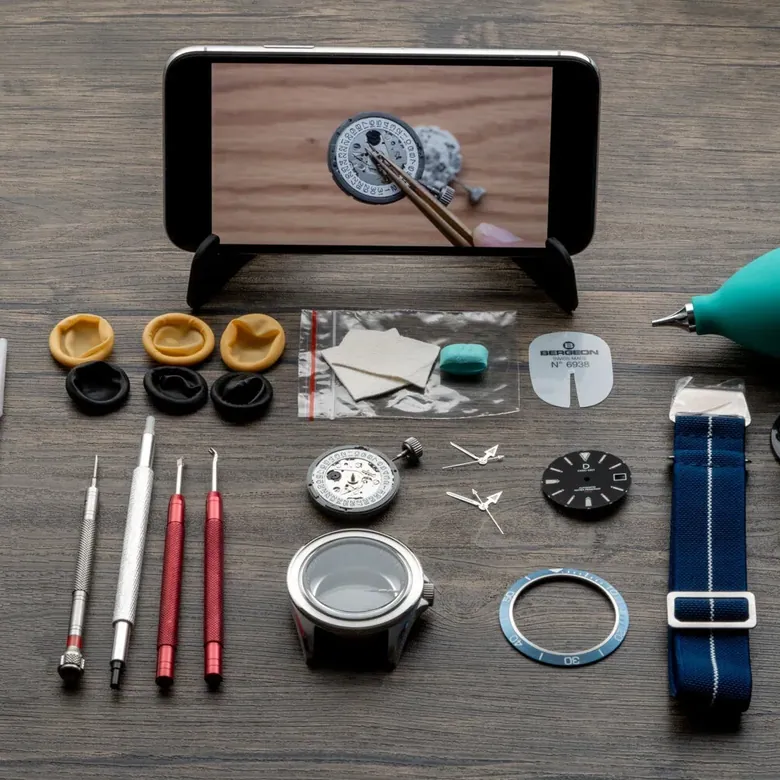
組み立てを始める前に、まず部品や工具の名称を確認しましょう。
部品: 1. 外装ケース 2. ベゼルインサート 3. リューズ・巻芯 4. ムーブメントホルダー 5. チャプターリング 6. 文字盤(ダイアル) 7. 指針 8. ムーブメント 9. ガスケット(Oリング) 10. ストラップ 11. クイックリリースバネ棒 (ストラップの種類によっては必要ありません)
工具・ツール: 1. ピンセット 2. 指サック 3. ダストポンプ 4. スウェード生地 5. ロディコ 6. ルーペ 7. 外装ケース用ツール 8. 指針取り外し用ツール(剣抜き) 9. 指針取り外し用保護フィルム 10. 指針取り付け用工具(剣差し) 11. 木製ペグ 12. スクリュードライバー 13. 秒針取り付け補助工具
1: 文字盤、ムーブメントの取り付け・組み立て
はじめに:日付機能付き機械式腕時計の基本的な使い方ここでは、日付機能を備えた機械式腕時計の仕組みや基本的な取り扱い方法について解説します。 すでに機械式腕時計の構造や操作方法をご存じの方は、この動画を省略し、次の動画へ進んでいただいても構いません。動画内容・リューズの操作方法(位置の切り替え、時刻の合わせ方)・日付設定を行ってはいけない時間帯・表示されている時刻が午前か午後かを判別する方法
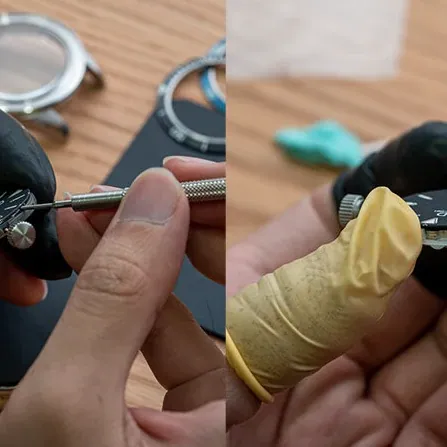
1a. キットの開封と指サックの装着キットに含まれる内容の確認と、ムーブメントを保護するための指サックの装着方法について解説します。動画内容:・キット内容の確認・指サックの装着方法と、装着が必要な理由の説明
1b. 外装ケース周辺部品の準備腕時計の外装ケースは、パーツをホコリや汚れから守るため、簡易的に組み立てられた状態でお届けしています。ここでは、外装ケース本体および周辺部品について解説します。動画内容:・外装ケースの裏蓋の開け方・各部品の配置方法
1c. ムーブメント取り付け時の注意事項機械式ムーブメントは腕時計の心臓部です。取り付けの際は、細心の注意を払う必要があります。ここでは、ムーブメントを取り付ける際に注意すべき点について解説します。動画内容:・ムーブメント各パーツの紹介・触れてはいけない部品・箇所・力を加えてもよい部品・箇所
1d. 巻芯およびリューズの装着・取り外し方法巻芯やリューズの取り付け・取り外しは、腕時計の組立や修理を行ううえで欠かせない作業です。ここでは、時計作りや改造において頻繁に行う巻芯とリューズの装着・取り外しについて解説します。動画内容:・リューズの機能・リューズの取り付け、取り外し
1e. 文字盤(ダイアル)の取り付けここでは、文字盤の取り付け方法について解説します。文字盤を取り付けた後は、指針の取り付け作業に進みます。動画内容:・ムーブメントへの文字盤の取り付け方法
下の写真は、ムーブメント上にある文字盤固定用の穴の位置を示しています。(緑色部分)
View fullsize
NH35
NH70, NH71 & NH72
任意工程:文字盤(ダイアル)の取り外し方法
View fullsize
ダイアルを取り外す場合は、スクリュードライバーを使用します。 スクリュードライバーを文字盤とムーブメント、またはムーブメントホルダーの間に差し込み、文字盤を取り外します。作業の際は、文字盤の脚の近くにスクリュードライバーを差し込むと作業がしやすくなります。セイコーNHムーブメントの場合、文字盤取り外し用の穴がムーブメントホルダーに設けられています。
2: 指針の取り付けと調整
指針の取り付けは初心者には難易度の高い工程です。作業を始める前に、十分に休憩をとってから行いましょう。
【重要】注意事項:取り付け作業中は、秒針の軸を曲げないよう細心の注意を払ってください。軸が曲がると、ムーブメントの機能や動作に不具合が生じる原因となります。指針の取り付けを何度も繰り返すと、指針が緩くなる恐れがあります。そのため、取り付け作業は丁寧に行い、なるべく取り付け直す回数を減らすよう心がけてください。キットには、指針の付け替え用の指針が一組同封されています。
2a. 時針と分針の取り付け組み立てた時針と分針を、文字盤およびムーブメントに取り付けます。動画内容・時針の取り扱い方法・指針の取り付け方法・指針の角度および方向の調整方法
指針を取り外す必要がある場合は、こちらを参照してください:
指針の取り外し方法の解説
2b. 秒針の取り付け注意!この工程は非常に難易度が高く、誤った操作により部品に元に戻せないキズやダメージを与える可能性があります。作業時は細心の注意を払ってください。
秒針取り付けのコツ:秒針と同じ高さの位置で、横から秒針を確認しながら取り付けると作業がしやすくなります。
秒針取り付け補助工具を使用すると、秒針の取り付け作業が簡単になります。動画内容・補助工具の紹介・補助工具を使った秒針の取り付け方法
3: 外装ケースやその他部品の取り付け
3a. 部品およびムーブメントのクリーニング組み立てたムーブメントや部品のクリーニング方法について解説します。動画内容・ダストポンプを使った掃除方法・ロディコを使った掃除方法・木製ペグを使った掃除方法
3b. ウォッチケースのクリーニングここでは、ウォッチケースの掃除方法について解説します。動画内容・ケースの内部を手で触れずに掃除する方法・ロディコ、木製ペグ、スウェード生地を使った掃除方法
3c. チャプターリングと外装ケースの取り付けここでは、組み立てたムーブメントを外装ケースに収める方法について解説します。動画内容:・組み立てた部品の取り付け・ムーブメントおよびリューズの設置方法・ケースの裏蓋の取り付け
任意工程:ベゼルの交換この動画では、当社の40mmダイバーズウォッチに対応したベゼルの取り外しおよび取り付けの主な手順について解説します。
他の部品や組み立てたパーツを取り付け直す必要がある場合は、以下を参照してください:
外装ケースの取り外し方法の解説
最終確認
ゼンマイを巻き上げ、時刻を合わせて、腕時計が正常に作動しているか確認してください。指針が他の指針や部品と接触せずに回っていることを確認しましょう。ガラス、指針、文字盤、その他の部品にホコリや汚れが付着していないか確認してください。必要に応じて、ケースを取り外してクリーニングを行ってください。裏蓋がしっかりと取り付けられているか確認してください。腕時計の防水性に関わる重要な工程です。
DIY腕時計の完成まであと少しストラップの取り付けと調整従来のバネ棒は、取り付けや取り外しに専用工具が必要ですが、クイックリリースバネ棒を使用すると、工具なしで簡単にストラップを交換できます。この動画では、クイックリリースストラップを取り付ける際のコツやポイントを解説します。
40 mm · Otomatik
diy-watch-club
USD 外装ケースの取り外し方法の解説一部工程をやり直す場合、必要に応じて以下の作業を行ってください:外装ケースの取り外し指針の取り外し文字盤(ダイアル)の取り外し
1. 外装ケースの取り外しムーブメントに対して作業を行う際は、外装ケースを取り外す必要があります。動画内容:・安全に外装ケースを取り外す方法
2. 指針の取り外し文字盤を取り外す前に、指針を取り外す必要があります。動画内容:・指針取り外し用工具を使った指針の取り外し方法
3. 文字盤の取り外し文字盤を取り外す場合は、スクリュードライバーを使用します。スクリュードライバーを文字盤とムーブメント、またはムーブメントホルダーの間に差し込み、文字盤を取り外します。作業の際は、文字盤の脚の近くにスクリュードライバーを差し込むと作業がしやすくなります。セイコーNHムーブメントの場合、文字盤取り外し用の穴がムーブメントホルダーに設けられています。
39.5 mm
diy-watch-club
USD Welcome to the DIY Watch Assembly Instruction
In the next two hours, you will dive into the world of watchmaking.Please relax, take your time, and enjoy the fun of the craft of watchmaking!
Diver Assembly Instructions
Before starting, you can familiarize yourself with the tools and parts needed:
Parts:watch casebezel insertcrown and stemmovement holderchapter ringdialhandsmovementgasketstrapquick release spring bars (optional depending on strap type)
Tools:tweezersfinger cotshand pumpsuedeRodicoloupecase openerhand removal toolsprotective film for hand removalhand setting toolpeg woodscrewdriver
1: Dial and Movement Assembly Installation
Introduction: how to use mechanical watches with dateThis is a brief introduction to the basics of a mechanical watch with date function, which might prove useful in your subsequent installation. If you are already familiar with how a mechanical watch works, feel free to skip this video and proceed to the next one.Content:crown position for setting datewhen to avoid setting datehow to determine AM/PM
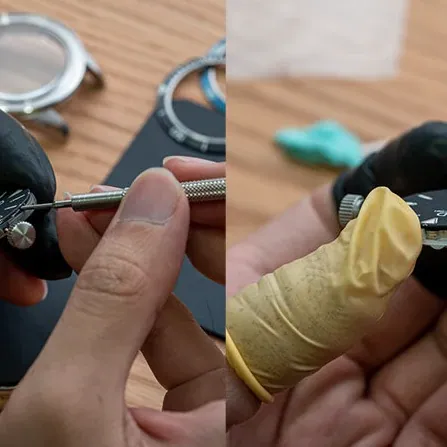
1a. Opening the package and wearing finger cotsIntroduction to what’s inside the package, and how to wear finger cots to protect the movement.Content:introduce package contenthow to wear finger cots, and why
1b. Preparing case partsYour watch case comes pre-assembled in order to keep it clean. This part will show you the individual parts of a case.Content:How to open case backHow to place parts
1c. Precautions during movement installationMechanical movement is the soul of a watch. It takes great care to install it. In this part, we’ll show you what to be mindful of when you install the movement. Content:Introduction of different parts of a movementAreas you should not touchAreas you can apply pressure on
1d. Removal and installation of stem and crownWatch assembly and basic watch repair require you to install and remove the stem and crown. You will need to do this multiple times throughout this workshop.Content:Function of crownHow to remove and install crown
1e. Installing dialPlease choose below the type of dial you’re assembling:
Normal dial, sandwich dial, and skeleton dial (opaque metal)
In this part, we will install the dial. After assembling them, we will proceed to the next part, where we install the watch hands.Content:Install dial onto the movement
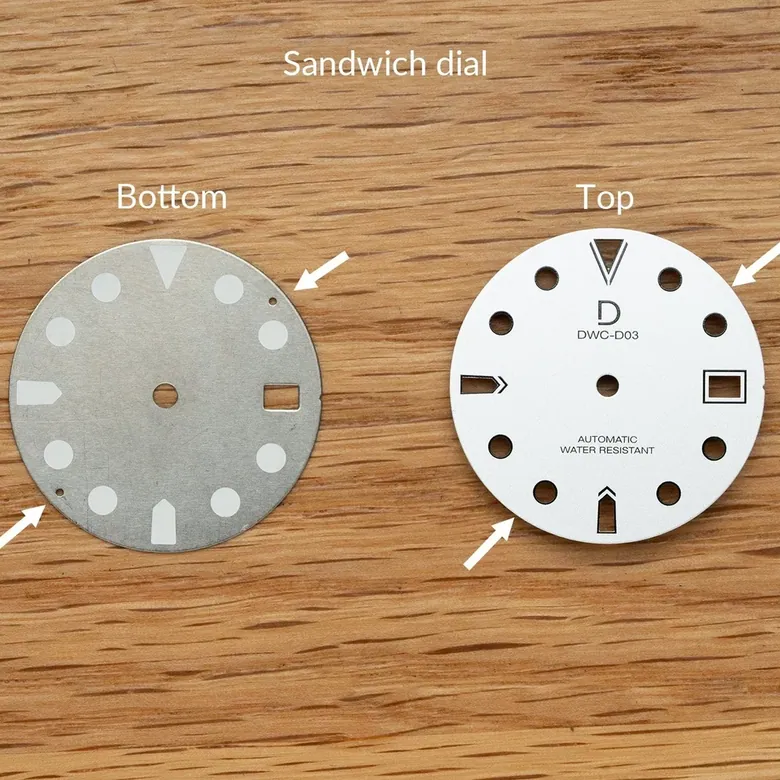
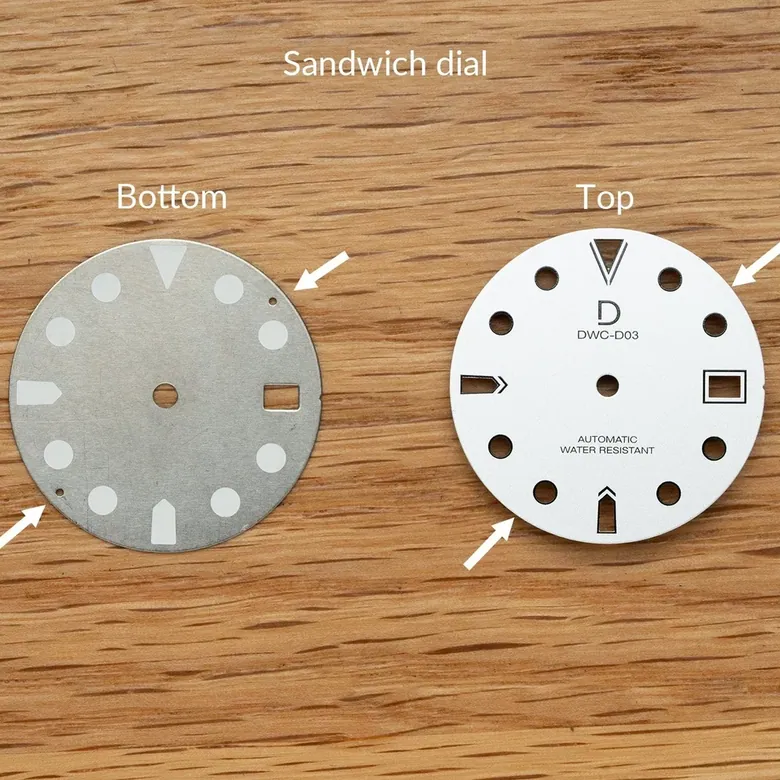
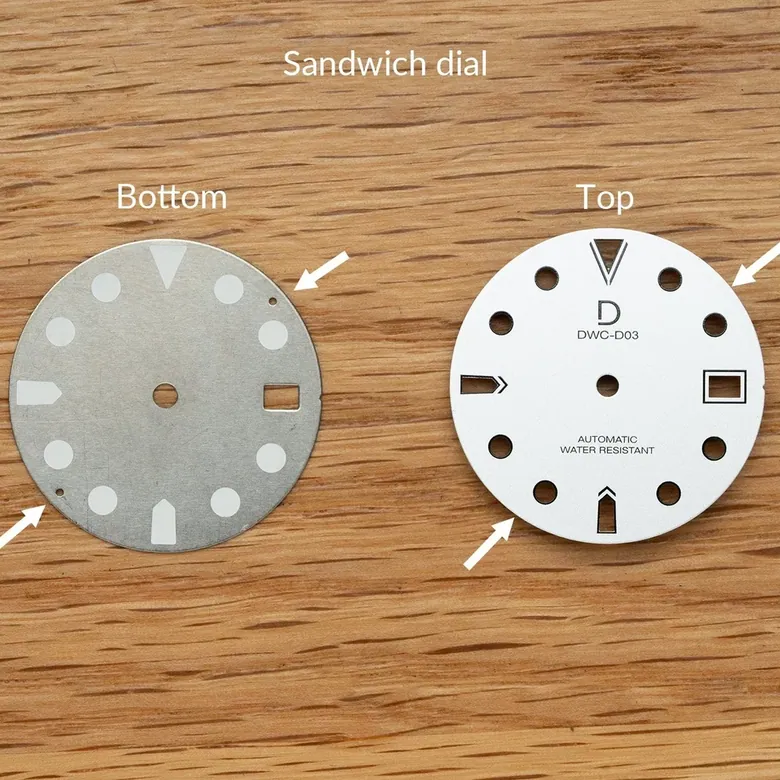
Your sandwich dial has a top and bottom layer. Normally they should come assembled in the kit, but if they fall off, you can reassemble them by aligning the feet and hole indicated by the arrows.
The following pictures indicate the movement dial holes (green spot):
View fullsize
NH35 movement
NH70 & NH72 movement
Optional: How to remove the dial
View fullsize
To remove the dial, simply use a screw driver, and insert it in between the dial and the movement or movement holder. Inserting the screw driver next to the dial feet will give you a better control. For Seiko NH movements, you can find slots on the movement holder for this purpose.
Sapphire dial (transparent)
In this part, we will install the sapphire dial. After assembling them, we will proceed to the next part, where we install the watch hands.Content:Install sapphire dial onto the movementLearn how to remove the dial safely
1f. Installing movement holderIn this part, we will install the movement holder onto the movement assembly.Content:How to install the movement holder
2: Hand Installation and Adjustment
If this is your first time installing hands, it might be quite difficult. You can take a break first before continuing.
Hand installation instruction
back to top
3: Installing Case and Other Parts
[Optional] Bleaching bezel insert
Before installing your case, you can opt to give your bezel insert a faded look by carrying out a process called “bleaching”. Learn how to do it via the button below:
Try bleaching
3a. Cleaning parts and movement assemblyInstruction on how to clean parts and movement assemblyContent:Using hand pumpUsing rodicoUsing peg wood
3b. Cleaning watch caseIn this part, we will clean the watch caseContent:Avoid touching the inside of caseUsing rodico, peg wood, and suede for cleaning
3c. Installing chapter ring and watch caseIn this part, we will install the movement assembly with hands into the caseContent:Installing assemblyAligning movement and stemInstalling case back
3d. (optional) Installing custom rotorIf you have customised a rotor, replace the factory default rotor with your custom rotor.Content:Finding the right screwdriverRemoving the rotorPutting on the new rotorFor Seiko rotor:
3e. (optional) switching bezels
If you need to reinstall any of the components, you can refer to this:
case removal instruction
FINAL CHECK!
Check for proper watch functions by winding and setting time. When hands are being turned, check if they come into contact with other hands or parts.Check for dust or dirt on crystal, hands, dial or other parts. If needed, you can remove the case to clean the inside.Check if the case back is securely fastened. If not, water resistance capability of the watch might be compromised.
Almost there!Good job! You are now one step away from your DIY watch!
Proceed to final instruction
40 mm · Otomatik
diy-watch-club
USD Instructions for Case RemovalIf you want to redo a certain step, depending on the need, you need to carry out:Case removalHand removalDial removal
1. Case removalTo access the movement assembly, you have to remove the case first.Content:Learn how to remove the case safely
2. Hand removalBefore removing the dial, you need to remove the hands first.Content:learn how to remove the hands with the hand removal tool
3. Dial removalTo remove the dial, simply use a screw driver, and insert it in between the dial and the movement or movement holder. Inserting the screw driver next to the dial feet will give you a better control. For Seiko NH movements, you can find slots on the movement holder for this purpose.
40 mm
diy-watch-club
USD Welcome to the DIY Watch Assembly Instruction
In the next two hours, you will dive into the world of watchmaking.Please relax, take your time, and enjoy the fun of the craft of watchmaking!
Expedition Assembly Instructions
Before starting, you can familiarize yourself with the tools and parts needed:
Parts:watch casebezel insertcrown and stemmovement holderchapter ringdialhandsmovementgasketstrapquick release spring bars (optional depending on strap type)
Tools:tweezersfinger cotshand pumpsuedeRodicoloupecase openerhand removal toolsprotective film for hand removalhand setting toolpeg woodscrewdriver
1: Dial and Movement Assembly Installation
Optional: Dial and hand aging guideIf you have the aging kit, you can head over to the aging guide instruction page first to get your dial and hands aged before assembling them into your watch.
To Aging guide
Introduction: how to use mechanical watches with dateThis is a brief introduction to the basics of a mechanical watch with date function, which might prove useful in your subsequent installation. If you are already familiar with how a mechanical watch works, feel free to skip this video and proceed to the next one.Content:crown position for setting datewhen to avoid setting datehow to determine AM/PM
1a. Opening the package and wearing finger cotsIntroduction to what’s inside the package, and how to wear finger cots to protect the movement.Content:introduce package contenthow to wear finger cots, and why
1b. Preparing case partsYour watch case comes pre-assembled in order to keep it clean. This part will show you the individual parts of a case.Content:How to open case backHow to place parts
1c. Precautions during movement installationMechanical movement is the soul of a watch. It takes great care to install it. In this part, we’ll show you what to be mindful of when you install the movement. Content:Introduction of different parts of a movementAreas you should not touchAreas you can apply pressure on
1d. Removal and installation of stem and crownWatch assembly and basic watch repair require you to install and remove the stem and crown. You will need to do this multiple times throughout this workshop.Content:Function of crownHow to remove and install crown
(For Miyota movement only)Optional: Installing factory movement holderThis video is optional and only useful for Miyota movement. If you do not have a Miyota movement, please skip forward to the next video.
Miyota movement only
The Miyota white factory movement holder comes pre-installed with the movement.If the white movement holder is somehow detached during installation, the following video will show you how to install it back.If it is still securely in place, you can skip this video and proceed to the next one.
1e. Installing dialPlease choose below the type of dial you’re assembling:
Normal dial, sandwich dial, skeleton dial (opaque metal)
In this part, we will install the dial. After assembling them, we will proceed to the next part, where we install the watch hands.Content:Install dial onto the movement
Your sandwich dial has a top and bottom layer. Normally they should come assembled in the kit, but if they fall off, you can reassemble them by aligning the feet and hole indicated by the arrows.
The following pictures indicate the movement dial holes (green spot):
View fullsize
82S0 movement without factory movement holder
View fullsize
82S0 movement with factory movement holder
View fullsize
NH35 movement
NH70 & NH72 movement
Optional: How to remove the dial
View fullsize
To remove the dial, simply use a screw driver, and insert it in between the dial and the movement or movement holder. Inserting the screw driver next to the dial feet will give you a better control. For Seiko NH movements, you can find slots on the movement holder for this purpose.
Sapphire dial (transparent)
In this part, we will install the sapphire dial. After assembling them, we will proceed to the next part, where we install the watch hands.Content:Install dial onto the movementLearn how to remove the dial safely
1f. Installing movement holderIn this part, we will install the movement holder onto the movement assembly.Content:How to install the movement holder
2: Hand Installation and Adjustment
If this is your first time installing hands, it might be quite difficult. You can take a break first before continuing.
Hand installation instruction
back to top
3: Installing Case and Other Parts
3a. Cleaning parts and movement assemblyInstruction on how to clean parts and movement assemblyContent:Using hand pumpUsing rodicoUsing peg wood
3b. Cleaning watch caseIn this part, we will clean the watch caseContent:Avoid touching the inside of caseUsing rodico, peg wood, and suede for cleaning
3c. Installing chapter ring and watch caseIn this part, we will install the movement assembly with hands into the caseContent:Installing assemblyAligning movement and stemInstalling case back
3d. (optional) Installing custom rotorIf you have customised a rotor, replace the Seiko rotor with your custom rotor.Content:Finding the right screwdriverRemoving the rotorPutting on the new rotor
If you need to reinstall any of the components, you can refer to this:
case removal instruction
FINAL CHECK!
Check for proper watch functions by winding and setting time. When hands are being turned, check if they come into contact with other hands or parts.Check for dust or dirt on crystal, hands, dial or other parts. If needed, you can remove the case to clean the inside.Check if the case back is securely fastened. If not, water resistance capability of the watch might be compromised.
Almost there!Good job! You are now one step away from your DIY watch!
Proceed to final instruction
39 mm · Otomatik
diy-watch-club
USD Instructions for Case RemovalIf you want to redo a certain step, depending on the need, you need to carry out:Case removalHand removalDial removal
1. Case removalTo access the movement assembly, you have to remove the case first.Content:Learn how to remove the case safely
2. Hand removalBefore removing the dial, you need to remove the hands first.Content:learn how to remove the hands with the hand removal tool
3. Dial removalTo remove the dial, simply use a screw driver, and insert it in between the dial and the movement or movement holder. Inserting the screw driver next to the dial feet will give you a better control. For Seiko NH movements, you can find slots on the movement holder for this purpose.
40 mm
diy-watch-club
USD 歡迎來到DIY Watch Club組裝教學
在未來的兩個多小時,你將會進入手錶的工藝世界。請放鬆心情,慢慢享受手錶工藝的樂趣!
Expedition手錶安裝教學
開始前,你可以先認識所需的工具及零件:
零件:錶殼錶圈片錶冠及霸芯機芯內罩內圈錶面指針機芯防水膠圈錶帶快拆彈簧杆(視乎錶帶款式)
工具:尖鉗指套氣泵麂皮Rodico放大鏡手錶開蓋器起針器起針保護膠片裝針器柳木螺絲起子
1: 錶面及機芯組安裝
選項:錶面與錶針舊化教學如果你有舊化套裝,你可以先前往舊化教學,進行錶面和錶針的舊化過程,完成後再回到此組裝教學,將舊化零件組裝至手錶中。
往舊化教學
簡介:如何使用有日期功能的機械手錶這段影片簡介使用有日期功能的機械手錶的基本要點,這些要點將有助你進行其後的安裝。如果你已經熟悉機械手錶的運作,你可以跳過這段影片前往下一段教學影片。內容:調較日期的錶冠位置何時需要避免調較日期如何找出機芯是處於早上還是晚上時間
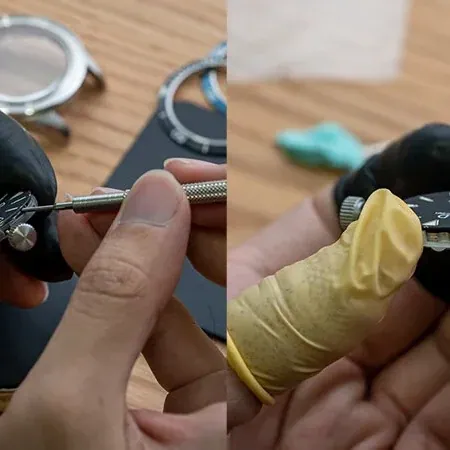
1a. 打開套裝及戴上指套簡介套裝內容,及介紹如何戴上指套,以保護機芯。內容:套裝內容簡介如何戴上指套
1b. 準備錶殼零件你的錶殼已事先組裝,以保持清潔。此部分將教導您構成錶殼的各個零件。內容:如何扭開底蓋如何放置零件
1c. 安裝機械機芯注意事項機械機芯是手錶的靈魂,需要小心安裝。這一部分的短片會講解安裝時需要小心注意的事項。內容:機芯部件簡介避免接觸的機芯部分機芯可施力的部分
1d. 安裝霸芯及錶冠組裝手錶及基本手錶維修都需要安裝霸芯及錶冠。整個工作坊內,我們將需要多次進行這個步驟。內容:錶冠功能如何移除及安裝錶冠
(只適合Miyota 機芯)安裝預設機芯內罩此影片只為Miyota 機芯而設。如你的機芯不是Miyota,你可以前往下一段影片。
只限Miyota 機芯
Miyota 的預設白色機芯內罩應已經隨機芯裝上。如白色內罩在任何時候鬆脫,此影片會教你如何重新安裝。如你的白色內罩仍然是穩妥在機芯之上,你可以跳過這段影片。
1e. 安裝錶面請選擇你的錶面種類:
普通錶面、三明治錶面、鏤空錶面(不透明金屬)
這部分,我們將會安裝錶面。組裝完成後,我們將進入安裝錶針的部分。內容:安裝錶面至機芯上
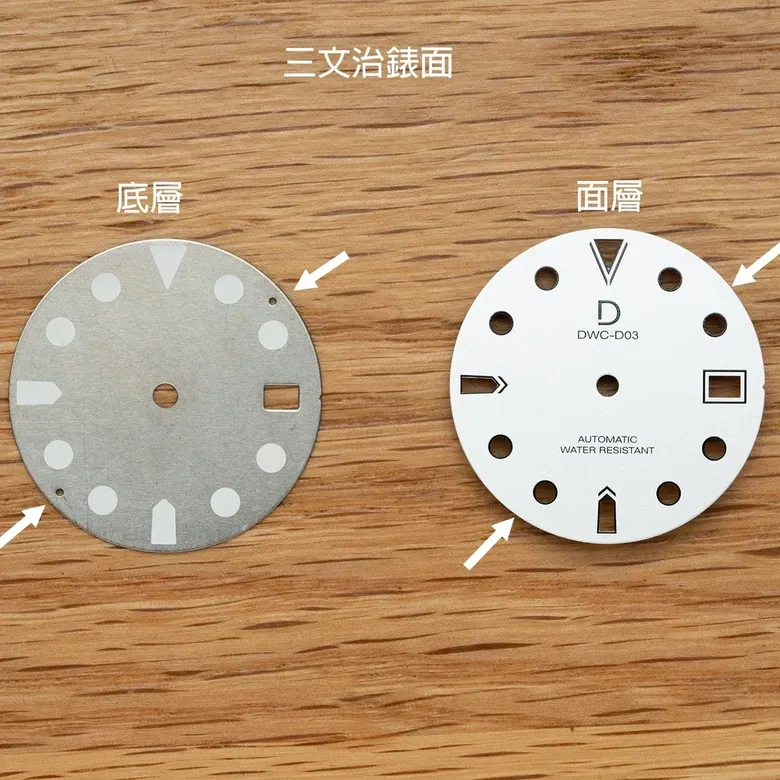
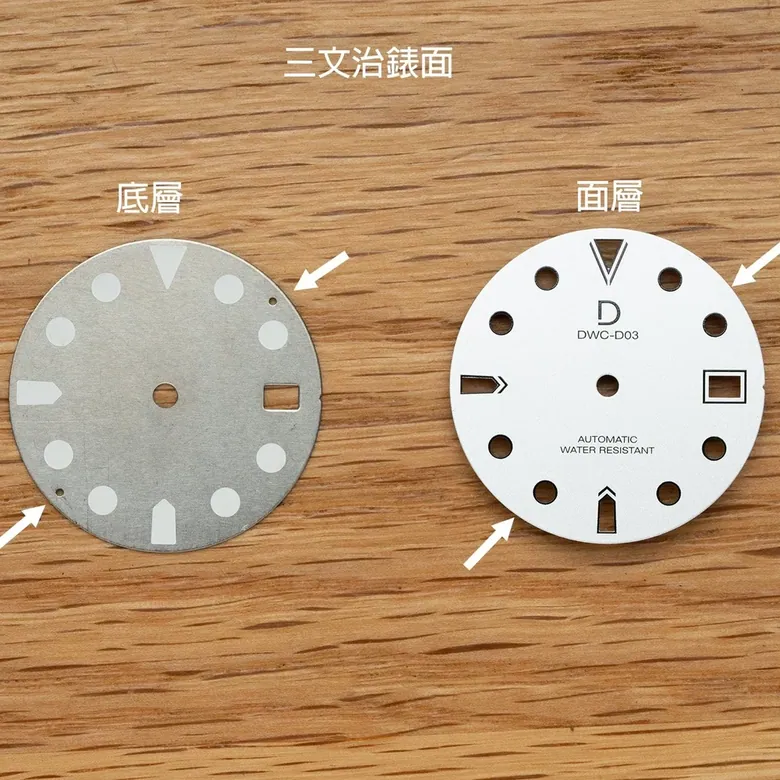
三文治錶面分為面層和底層,如果它們在組裝過程中分離,請對準箭頭所示的孔和腳,將其重新安裝。
以下圖像標示了各機芯上的錶面安裝位置:
沒有機芯內罩的82S0機芯
帶有機芯內罩的82S0機芯
NH35機芯
NH70 & NH72機芯
選項:如何移除錶面
如你需要移除錶面,你只需使用螺絲起子插進錶面和機芯或機芯內罩的空隙。在錶面腳的附近插入會有更好的控制。Seiko NH 機芯的內罩上更有專門設計的凹位讓螺絲起子進入。
藍寶石錶面(透明)
這部分,我們將會安裝錶面。組裝完成後,我們將進入安裝錶針的部分。內容:安裝錶面至機芯上
1f. 安裝機芯內罩這部分,我們將會把機芯內罩安裝至機芯組件上。內容:如何安裝機芯內罩
2:錶針安裝及調整
首次安裝錶針可能會有點困難。如果需要可以先休息一會再繼續。
錶針安裝教學
回到頁首
3: 安裝錶殼和其他零件
3a. 清理零件及機芯組教導如何清理零件及組件。.內容:使用氣泵使用rodico使用柳木
3b. 清理錶殼此部分,我們將會清理錶殼。內容:避免接觸錶殼內側使用rodico、柳木及麂皮清理
3c. 安裝內圈和錶殼此部分,我們將會把已安裝錶針的機芯組安裝至錶殼之中。內容:安裝機芯組對齊機芯及霸芯安裝底蓋
如果需要重新安裝可以參考:
移除教學
最後檢查!
嘗試上鏈、調整時間等功能,以檢查手錶可否正常運作。再次檢查錶針運轉時會不會碰到其他錶針或零件。檢查錶殼水晶、錶針、錶面等零件有沒有塵點或污跡。如有需要可以移除錶殼清理。確認底蓋已穩固地完全鎖上,否則手錶有可能不防水。
只差一步!做得好!你即將可以完成你的DIY 手錶!
前往教學
40 mm · Otomatik
diy-watch-club
USD Welcome to the DIY Watch Assembly Instruction
In the next two hours, you will dive into the world of watchmaking.Please relax, take your time, and enjoy the fun of the craft of watchmaking!
Flight Series Assembly Instructions
Before starting, you can familiarize yourself with the tools and parts needed:
Parts:watch casebezel insertcrown and stemmovement holderchapter ringdialhandsmovementgasketstrapquick release spring bars (optional depending on strap type)
Tools:tweezersfinger cotshand pumpsuedeRodicoloupecase openerhand removal toolsprotective film for hand removalhand setting toolpeg woodscrewdriver
1: Dial and Movement Assembly Installation
Introduction: how to use mechanical watches with dateThis is a brief introduction to the basics of a mechanical watch with date function, which might prove useful in your subsequent installation. If you are already familiar with how a mechanical watch works, feel free to skip this video and proceed to the next one.Content:crown position for setting datewhen to avoid setting datehow to determine AM/PM
1a. Opening the package and wearing finger cotsIntroduction to what’s inside the package, and how to wear finger cots to protect the movement.Content:introduce package contenthow to wear finger cots, and why
1b. Preparing case partsYour watch case comes pre-assembled in order to keep it clean. This part will show you the individual parts of a case.Content:How to open case backHow to place parts
1c. Precautions during movement installationMechanical movement is the soul of a watch. It takes great care to install it. In this part, we’ll show you what to be mindful of when you install the movement. Content:Introduction of different parts of a movementAreas you should not touchAreas you can apply pressure on
1d. Removal and installation of stem and crownWatch assembly and basic watch repair require you to install and remove the stem and crown. You will need to do this multiple times throughout this workshop.Content:Function of crownHow to remove and install crown
1e. Installing movement holder and dialIn this part, we will install the dial. After assembling them, we will proceed to the next part, where we install the watch hands.Content:Install the movement into the movement holderInstall dial onto the movement holder
Optional: How to remove the dial
View fullsize
To remove the dial, simply use a screw driver, and insert it in between the dial and the movement or movement holder. Inserting the screw driver next to the dial feet will give you a better control. For Seiko NH movements, you can find slots on the movement holder for this purpose.
2: Hand Installation and Adjustment
If this is your first time installing hands, it might be quite difficult. You can take a break first before continuing.
Hand installation instruction
back to top
3: Installing Case and Other Parts
3a. Cleaning parts and movement assemblyInstruction on how to clean parts and movement assemblyContent:Using hand pumpUsing rodicoUsing peg wood
3b. Cleaning watch caseIn this part, we will clean the watch caseContent:Avoid touching the inside of caseUsing rodico, peg wood, and suede for cleaning
3c. Installing watch caseIn this part, we will install the movement assembly with hands into the caseContent:Installing assemblyAligning movement and stemInstalling case back
3d. (optional) Installing custom rotorIf you have customised a rotor, replace the Seiko rotor with your custom rotor.Content:Finding the right screwdriverRemoving the rotorPutting on the new rotor
If you need to reinstall any of the components, you can refer to this:
case removal instruction
FINAL CHECK!
Check for proper watch functions by winding and setting time. When hands are being turned, check if they come into contact with other hands or parts.Check for dust or dirt on crystal, hands, dial or other parts. If needed, you can remove the case to clean the inside.Check if the case back is securely fastened. If not, water resistance capability of the watch might be compromised.
Almost there!Good job! You are now one step away from your DIY watch!
Proceed to final instruction
40 mm · Mekanik (kurmalı)
diy-watch-club
USD Instructions for Case RemovalIf you want to redo a certain step, depending on the need, you need to carry out:Case removalHand removalDial removal
1. Case removalTo access the movement assembly, you have to remove the case first.Content:Learn how to remove the case safely
2. Hand removalBefore removing the dial, you need to remove the hands first.Content:learn how to remove the hands with the hand removal tool
3. Dial removalTo remove the dial, simply use a screw driver, and insert it in between the dial and the movement or movement holder. Inserting the screw driver next to the dial feet will give you a better control. For Seiko NH movements, you can find slots on the movement holder for this purpose.
40 mm
diy-watch-club
USD Welcome to the DIY Watch Assembly Instruction
In the next two hours, you will dive into the world of watchmaking.Please relax, take your time, and enjoy the fun of the craft of watchmaking!
GMT Expedition Assembly Instructions
Before starting, you can familiarize yourself with the tools and parts needed:
Parts:watch casebezel insertcrown and stemmovement holderchapter ringdialhandsmovementgasketstrapquick release spring bars (optional depending on strap type)
Tools:tweezersfinger cotshand pumpsuedeRodicoloupecase openerhand removal toolsprotective film for hand removalhand setting toolpeg woodscrewdriver
1: Dial and Movement Assembly Installation
Optional: Dial and hand aging guideIf you have the aging kit, you can head over to the aging guide instruction page first to get your dial and hands aged before assembling them into your watch.
To Aging guide
Introduction: how to use mechanical watches with dateThis is a brief introduction to the basics of a mechanical watch with date function, which might prove useful in your subsequent installation. If you are already familiar with how a mechanical watch works, feel free to skip this video and proceed to the next one.Content:crown position for setting datewhen to avoid setting datehow to determine AM/PM
1a. Opening the package and wearing finger cotsIntroduction to what’s inside the package, and how to wear finger cots to protect the movement.Content:introduce package contenthow to wear finger cots, and why
1b. Preparing case partsYour watch case comes pre-assembled in order to keep it clean. This part will show you the individual parts of a case.Content:How to open case backHow to place parts
1c. Precautions during movement installationMechanical movement is the soul of a watch. It takes great care to install it. In this part, we’ll show you what to be mindful of when you install the movement. Content:Introduction of different parts of a movementAreas you should not touchAreas you can apply pressure on
1d. Removal and installation of stem and crownWatch assembly and basic watch repair require you to install and remove the stem and crown. You will need to do this multiple times throughout this workshop.Content:Function of crownHow to remove and install crown
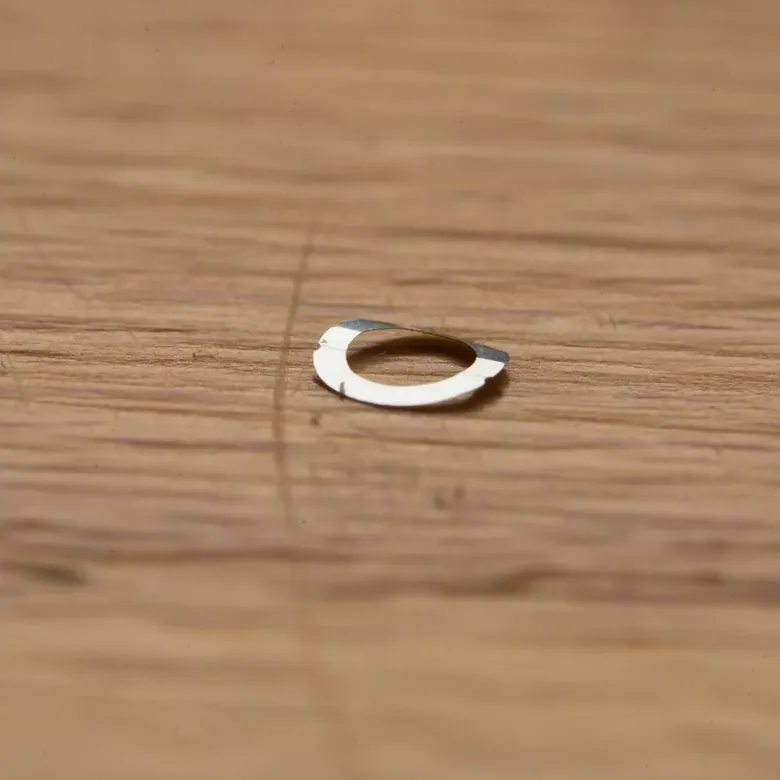
1e. Installing dialInstalling the hour wheel springBefore installing the dial, you need to install the hour wheel spring onto the movement. Notice which is the top side, and place it onto the central hour wheel (highlighted below).With the spring in place, you can proceed to the next guide on dial installation. The spring can easily fall off, so make sure it stays in place throughout the process.
1. Identify the hour wheel (highlighted in green)
2. Identify the top side of the spring
3. Place the spring onto the hour wheel
With the hour wheel spring installed, we will install the dial.Please choose below the type of dial you’re assembling:
Normal dial, sandwich dial, skeleton dial (opaque metal)
In this part, we will install the dial. After assembling them, we will proceed to the next part, where we install the watch hands.Content:Install dial onto the movement
Your sandwich dial has a top and bottom layer. Normally they should come assembled in the kit, but if they fall off, you can reassemble them by aligning the feet and hole indicated by the arrows.
The following pictures indicate the movement dial holes (green spot):
View fullsize
82S0 movement without factory movement holder
View fullsize
82S0 movement with factory movement holder
View fullsize
NH35 movement
NH70 & NH72 movement
Optional: How to remove the dial
View fullsize
To remove the dial, simply use a screw driver, and insert it in between the dial and the movement or movement holder. Inserting the screw driver next to the dial feet will give you a better control. For Seiko NH movements, you can find slots on the movement holder for this purpose.
Sapphire dial (transparent)
In this part, we will install the sapphire dial. After assembling them, we will proceed to the next part, where we install the watch hands.Content:Install dial onto the movementLearn how to remove the dial safely
1f. Installing movement holderIn this part, we will install the movement holder onto the movement assembly.Content:How to install the movement holder
2: Hand Installation and Adjustment
If this is your first time installing hands, it might be quite difficult. You can take a break first before continuing.
Hand installation instruction
back to top
3: Installing Case and Other Parts
3a. Cleaning parts and movement assemblyInstruction on how to clean parts and movement assemblyContent:Using hand pumpUsing rodicoUsing peg wood
3b. Cleaning watch caseIn this part, we will clean the watch caseContent:Avoid touching the inside of caseUsing rodico, peg wood, and suede for cleaning
3c. Installing chapter ring and watch caseIn this part, we will install the movement assembly with hands into the caseContent:Installing assemblyAligning movement and stemInstalling case back
3d. (optional) Installing custom rotorIf you have customised a rotor, replace the Seiko rotor with your custom rotor.Content:Finding the right screwdriverRemoving the rotorPutting on the new rotor
If you need to reinstall any of the components, you can refer to this:
case removal instruction
FINAL CHECK!
Check for proper watch functions by winding and setting time. When hands are being turned, check if they come into contact with other hands or parts.Check for dust or dirt on crystal, hands, dial or other parts. If needed, you can remove the case to clean the inside.Check if the case back is securely fastened. If not, water resistance capability of the watch might be compromised.
Almost there!Good job! You are now one step away from your DIY watch!
Proceed to final instruction
39 mm · Otomatik
diy-watch-club
USD 歡迎來到DIY Watch Club組裝教學
在未來的兩個多小時,你將會進入手錶的工藝世界。請放鬆心情,慢慢享受手錶工藝的樂趣!
GMT Expedition手錶安裝教學
開始前,你可以先認識所需的工具及零件:
零件:錶殼錶圈片錶冠及霸芯機芯內罩內圈錶面指針機芯防水膠圈錶帶快拆彈簧杆(視乎錶帶款式)
工具:尖鉗指套氣泵麂皮Rodico放大鏡手錶開蓋器起針器起針保護膠片裝針器柳木螺絲起子
1: 錶面及機芯組安裝
選項:錶面與錶針舊化教學如果你有舊化套裝,你可以先前往舊化教學,進行錶面和錶針的舊化過程,完成後再回到此組裝教學,將舊化零件組裝至手錶中。
往舊化教學
簡介:如何使用有日期功能的機械手錶這段影片簡介使用有日期功能的機械手錶的基本要點,這些要點將有助你進行其後的安裝。如果你已經熟悉機械手錶的運作,你可以跳過這段影片前往下一段教學影片。內容:調較日期的錶冠位置何時需要避免調較日期如何找出機芯是處於早上還是晚上時間
1a. 打開套裝及戴上指套簡介套裝內容,及介紹如何戴上指套,以保護機芯。內容:套裝內容簡介如何戴上指套
1b. 準備錶殼零件你的錶殼已事先組裝,以保持清潔。此部分將教導您構成錶殼的各個零件。內容:如何扭開底蓋如何放置零件
1c. 安裝機械機芯注意事項機械機芯是手錶的靈魂,需要小心安裝。這一部分的短片會講解安裝時需要小心注意的事項。內容:機芯部件簡介避免接觸的機芯部分機芯可施力的部分
1d. 安裝霸芯及錶冠組裝手錶及基本手錶維修都需要安裝霸芯及錶冠。整個工作坊內,我們將需要多次進行這個步驟。內容:錶冠功能如何移除及安裝錶冠
(只適合Miyota 機芯)安裝預設機芯內罩此影片只為Miyota 機芯而設。如你的機芯不是Miyota,你可以前往下一段影片。
只限Miyota 機芯
Miyota 的預設白色機芯內罩應已經隨機芯裝上。如白色內罩在任何時候鬆脫,此影片會教你如何重新安裝。如你的白色內罩仍然是穩妥在機芯之上,你可以跳過這段影片。
1e. 安裝錶面請選擇你的錶面種類:
普通錶面、三明治錶面、鏤空錶面(不透明金屬)
這部分,我們將會安裝錶面。組裝完成後,我們將進入安裝錶針的部分。內容:安裝錶面至機芯上
三文治錶面分為面層和底層,如果它們在組裝過程中分離,請對準箭頭所示的孔和腳,將其重新安裝。
以下圖像標示了各機芯上的錶面安裝位置:
沒有機芯內罩的82S0機芯
帶有機芯內罩的82S0機芯
NH35機芯
NH70 & NH72機芯
選項:如何移除錶面
如你需要移除錶面,你只需使用螺絲起子插進錶面和機芯或機芯內罩的空隙。在錶面腳的附近插入會有更好的控制。Seiko NH 機芯的內罩上更有專門設計的凹位讓螺絲起子進入。
藍寶石錶面(透明)
這部分,我們將會安裝錶面。組裝完成後,我們將進入安裝錶針的部分。內容:安裝錶面至機芯上
1f. 安裝機芯內罩這部分,我們將會把機芯內罩安裝至機芯組件上。內容:如何安裝機芯內罩
2:錶針安裝及調整
首次安裝錶針可能會有點困難。如果需要可以先休息一會再繼續。
錶針安裝教學
回到頁首
3: 安裝錶殼和其他零件
3a. 清理零件及機芯組教導如何清理零件及組件。.內容:使用氣泵使用rodico使用柳木
3b. 清理錶殼此部分,我們將會清理錶殼。內容:避免接觸錶殼內側使用rodico、柳木及麂皮清理
3c. 安裝內圈和錶殼此部分,我們將會把已安裝錶針的機芯組安裝至錶殼之中。內容:安裝機芯組對齊機芯及霸芯安裝底蓋
如果需要重新安裝可以參考:
移除教學
最後檢查!
嘗試上鏈、調整時間等功能,以檢查手錶可否正常運作。再次檢查錶針運轉時會不會碰到其他錶針或零件。檢查錶殼水晶、錶針、錶面等零件有沒有塵點或污跡。如有需要可以移除錶殼清理。確認底蓋已穩固地完全鎖上,否則手錶有可能不防水。
只差一步!做得好!你即將可以完成你的DIY 手錶!
前往教學
40 mm · Otomatik
diy-watch-club
USD Welcome to the DIY Watch Assembly Instruction
In the next two hours, you will dive into the world of watchmaking.Please relax, take your time, and enjoy the fun of the craft of watchmaking!
GMT Diver Assembly Instructions
Before starting, you can familiarize yourself with the tools and parts needed:
Parts:watch casebezel insertcrown and stemmovement holderchapter ringdialhandsmovementgasketstrapquick release spring bars (optional depending on strap type)
Tools:tweezersfinger cotshand pumpsuedeRodicoloupecase openerhand removal toolsprotective film for hand removalhand setting toolpeg woodscrewdriver
1: Dial and Movement Assembly Installation
Introduction: How to use a GMT mechanical watch with bezels.This is a brief introduction to the basics of the usage of a GMT mechanical watch, featuring both the NH34 and the Miyota 9075. If you are already familiar with how the GMT watches work, feel free to skip this video and proceed to the next one.Content:00:36 Comparing the Office/Caller vs the Traveller/Flyer/True GMT 01:19 Why the "TRUE" GMT? 01:54 How to use your GMT watches 02:38 Setting the "Home" time 03:13 Quick setting the second timezone 04:01 Using the bezels
1a. Opening the package and wearing finger cotsIntroduction to what’s inside the package, and how to wear finger cots to protect the movement.Content:introduce package contenthow to wear finger cots, and why
1b. Preparing case partsYour watch case comes pre-assembled in order to keep it clean. This part will show you the individual parts of a case.Content:How to open case backHow to place parts
1c. Precautions during movement installationMechanical movement is the soul of a watch. It takes great care to install it. In this part, we’ll show you what to be mindful of when you install the movement. Content:Introduction of different parts of a movementAreas you should not touchAreas you can apply pressure on
1d. Removal and installation of stem and crownWatch assembly and basic watch repair require you to install and remove the stem and crown. You will need to do this multiple times throughout this workshop.Content:Function of crownHow to remove and install crown
1e. Installing dialInstalling the hour wheel springBefore installing the dial, you need to install the hour wheel spring onto the movement. Take note of which side is the top side, and place it onto the central hour wheel (highlighted below).With the spring in place, you can proceed to the next guide on dial installation. The spring can easily fall off, so make sure it stays in place throughout the process.
Identify the hour wheel (highlighted in green)
2. Identify the top side of the spring
3. Place the spring onto the hour wheel
With the hour wheel spring installed, we will install the dial. Please refer to the following video for instructions.Content:Install dial onto the movement
Your sandwich dial has a top and bottom layer. Normally they should come assembled in the kit, but if they fall off, you can reassemble them by aligning the feet and hole indicated by the arrows.
The movement dial holes are highlighted below (green spot):
View fullsize
Optional: How to remove the dial
View fullsize
To remove the dial, simply use a screw driver, and insert it in between the dial and the movement or movement holder. Inserting the screw driver next to the dial feet will give you a better control. For Seiko NH movements, you can find slots on the movement holder for this purpose.
1f. Installing movement holderIn this part, we will install the movement holder onto the movement assembly.Content:How to install the movement holder
2: Hand Installation and Adjustment
If this is your first time installing hands, it might be quite difficult. You can take a break first before continuing.
Hand installation instruction
back to top
3: Installing Case and Other Parts
[Optional] Bleaching bezel insert
Before installing your case, you can opt to give your bezel insert a faded look by carrying out a process called “bleaching”. Learn how to do it via the button below:
Try Bleaching
3a. Cleaning parts and movement assemblyInstruction on how to clean parts and movement assemblyContent:Using hand pumpUsing rodicoUsing peg wood
3b. Cleaning watch caseIn this part, we will clean the watch caseContent:Avoid touching the inside of caseUsing rodico, peg wood, and suede for cleaning
3c. Installing chapter ring and watch caseIn this part, we will install the movement assembly with hands into the caseContent:Installing assemblyAligning movement and stemInstalling case back
3d. (optional) Installing custom rotorIf you have customised a rotor, replace the factory default rotor with your custom rotor.Content:Finding the right screwdriverRemoving the rotorPutting on the new rotorFor Seiko rotor:
3e. (optional) Switching bezels.This video will outline the key steps to remove and install bezels compatible with our 42mm Divers.
If you need to convert your bezel from uni-directional 60-click or 120-click to bi-directional 24-click (or vice versa), you will need to watch the following video.
If you need to reinstall any of the components, you can refer to this:
case removal instruction
FINAL CHECK!
Check for proper watch functions by winding and setting time. When hands are being turned, check if they come into contact with other hands or parts.Check for dust or dirt on crystal, hands, dial or other parts. If needed, you can remove the case to clean the inside.Check if the case back and the screw-down crown is securely fastened. If not, water resistance capability of the watch might be compromised.
Almost there!Good job! You are now one step away from your DIY watch!
Proceed to final instruction
42 mm · Otomatik
diy-watch-club
USD 歡迎來到DIY Watch Club組裝教學
在未來的兩個多小時,你將會進入手錶的工藝世界。請放鬆心情,慢慢享受手錶工藝的樂趣!
GMT手錶安裝教學
開始前,你可以先認識所需的工具及零件:
零件:錶殼錶圈片錶冠及霸芯機芯內罩內圈錶面指針機芯防水膠圈錶帶快拆彈簧杆(視乎錶帶款式)
工具:尖鉗指套氣泵麂皮Rodico放大鏡手錶開蓋器起針器起針保護膠片裝針器柳木螺絲批
1: 錶面及機芯組安裝
簡介:如何使用有日期功能的機械手錶這段影片簡介使用有日期功能的機械手錶的基本要點,這些要點將有助你進行其後的安裝。如果你已經熟悉機械手錶的運作,你可以跳過這段影片前往下一段教學影片。內容:調較日期的錶冠位置何時需要避免調較日期如何找出機芯是處於早上還是晚上時間
1a. 打開套裝及戴上指套簡介套裝內容,及介紹如何戴上指套,以保護機芯。內容:套裝內容簡介如何戴上指套
1b. 準備錶殼零件你的錶殼已事先組裝,以保持清潔。此部分將教導您構成錶殼的各個零件。內容:如何扭開底蓋如何放置零件
1c. 安裝機械機芯注意事項機械機芯是手錶的靈魂,需要小心安裝。這一部分的短片會講解安裝時需要小心注意的事項。內容:機芯部件簡介避免接觸的機芯部分機芯可施力的部分
1d. 安裝霸芯及錶冠組裝手錶及基本手錶維修都需要安裝霸芯及錶冠。整個工作坊內,我們將需要多次進行這個步驟。內容:錶冠功能如何移除及安裝錶冠
1e. 安裝錶面安裝時輪彈簧片安裝錶面前,你需要安裝時輪彈簧片至機芯之上。留意哪一面為上方,並將其放置在中央的時輪上(如下圖所示)彈片安裝好後,你可以繼續觀看下一段教學以安裝錶面。彈片容易掉落,所以請在組裝過程中確保它仍在位置。
1. 找出時輪(圖中綠色零件)
2. 此為彈片的上方
3. 把彈片放在時輪之上
這部分,我們將會安裝錶面。組裝完成後,我們將進入安裝錶針的部分。內容:安裝錶面至機芯上
三文治錶面分為面層和底層,如果它們在組裝過程中分離,請對準箭頭所示的孔和腳,將其重新安裝。
錶面底部的腳應插進這些開孔:
選項:如何移除錶面
如你需要移除錶面,你只需使用螺絲批插進錶面和機芯或機芯內罩的空隙。在錶面腳的附近插入會有更好的控制。Seiko NH 機芯的內罩上更有專門設計的凹位讓螺絲批進入。
1f. 安裝機芯內罩這部分,我們將會把機芯內罩安裝至機芯組件上。內容:如何安裝機芯內罩
2:錶針安裝及調整
首次安裝錶針可能會有點困難。如果需要可以先休息一會再繼續。
錶針安裝教學
回到頁首
3: 安裝錶殼和其他零件
3a. 清理零件及機芯組教導如何清理零件及組件。.內容:使用氣泵使用rodico使用柳木
3b. 清理錶殼此部分,我們將會清理錶殼。內容:避免接觸錶殼內側使用rodico、柳木及麂皮清理
3c. 安裝內圈和錶殼此部分,我們將會把已安裝錶針的機芯組安裝至錶殼之中。內容:安裝機芯組對齊機芯及霸芯安裝底蓋
如果需要重新安裝可以參考:
移除教學
最後檢查!
嘗試上鏈、調整時間等功能,以檢查手錶可否正常運作。再次檢查錶針運轉時會不會碰到其他錶針或零件。檢查錶殼水晶、錶針、錶面等零件有沒有塵點或污跡。如有需要可以移除錶殼清理。確認底蓋已穩固地完全鎖上,否則手錶有可能不防水。
只差一步!做得好!你即將可以完成你的DIY 手錶!
前往教學
40 mm
diy-watch-club
USD Instruction for case removal for MoselIf you want to redo a certain step, depending on the need, you need to carry out:Case removalHand removalDial removal
1. Case removalTo remove the case, you only need to:Use the case removal tool, turn the case back anticlockwise to open itRemove the crown with stemTake out the movement assemblyFor details you can revisit the clip 3d 3:05 in the main instruction section.
2. Hand removalBefore removing the dial, you need to remove the hands first.Content:learn how to remove the hands with the hand removal tool
3. Dial removal(Take great care when removing the dial, otherwise the pins at the back of the dial can be broken)Content:How to remove the movement holderHow to remove the dial properly
40 mm
diy-watch-club
USD 歡迎來到DIY Watch Club組裝教學
在未來的兩個多小時,你將會進入手錶的工藝世界。請放鬆心情,慢慢享受手錶工藝的樂趣!
Mosel系列安裝教學
開始前,你可以先認識所需的工具及零件:
零件:錶殼錶冠及霸芯機芯內罩錶面指針(時分針2套)機芯
工具:尖鉗指套氣泵麂皮Rodico放大鏡手錶開蓋器(釘頭x3, 需另外安裝)起針器起針保護膠片裝針器柳木螺絲批 (Mosel Lite 套裝除外)手機支架
1: 錶面及機芯模組安裝
1a. 打開套裝及戴上指套簡介套裝內容,及介紹如何戴上指套,以保護機芯。內容:套裝內容簡介如何戴上指套
1b. 準備錶殼零件您的錶殼已事先組裝,以保持清潔。此部分將教導您構成錶殼的各個零件。內容:如何扭開底蓋如何放置零件
1c. 安裝機械機芯注意事項機械機芯是手錶的靈魂,需要小心安裝。這一部分的短片會講解安裝時需要小心注意的事項。內容:機芯部件簡介避免接觸的機芯部分機芯可施力的部分
1d. 安裝霸芯及霸的
View fullsize
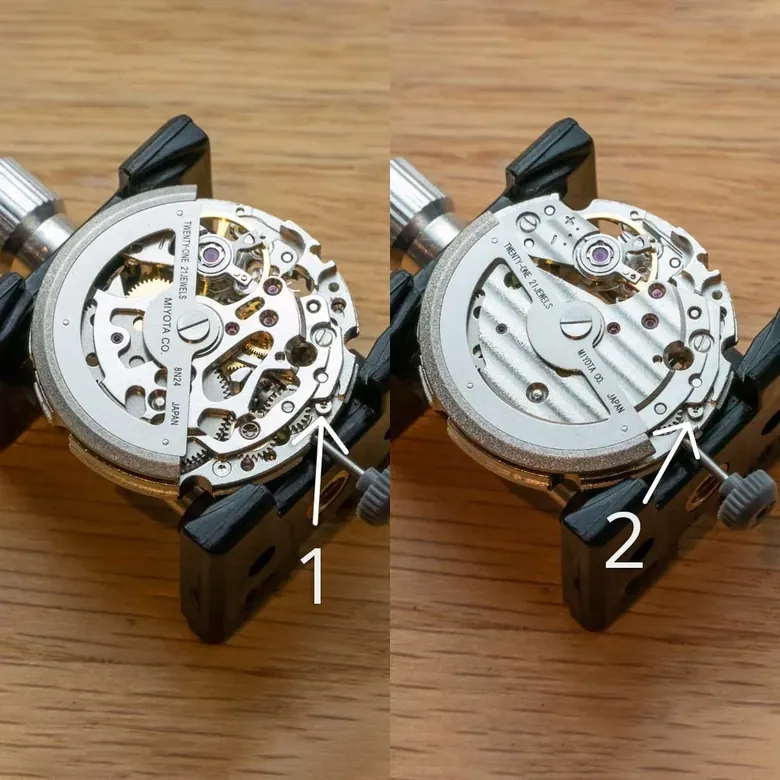
注意事項8N24霸芯移除按鈕位置82S0霸芯移除按鈕位置
組裝手錶及基本手錶維修都需要安裝霸芯及霸的。整個工作坊內,我們將需要多次進行這個步驟。內容:霸的功能如何移除及安裝霸的
1e. 安裝錶面及機芯這部分,我們將會安裝錶面、機芯內罩、及機芯。組裝完成後,我們將進入安裝錶針的部分。內容:安裝機芯至內罩中安裝錶面至機芯上
新的機芯內罩附有三個凸出處,分別對應機芯上的三個凹處,可以協助機芯對位。如果內罩上沒有這些凸出處,仍可正常安裝。
繼續前,請先檢查:
錶面與機芯內罩安裝穩妥,錶面背面的兩枝釘腳已正確插進機芯。錶面與機芯內罩之間可以有小於1mm的縫隙,但是越小越好。
View fullsize
回到頁首
2:錶針安裝及調整
首次安裝錶針可能會有點困難。如果需要可以先休息一會再繼續。準備好後,請你選擇你的手錶是兩針版本(只有時、分針)還是三針版本(有時、分、秒針):
兩針安裝教學
三針安裝教學
回到頁首
3: 安裝錶殼和其他組件
3a. 清理零件及組件教導如何清理零件及組件。.內容:使用氣泵使用rodico使用柳木
3b. 清理錶殼此部分,我們將會清理錶殼。
1. 如錶冠上有藍色的保護貼,可跟據右方方法移除。
2. 用普通的膠紙貼在藍色保護貼上, 用力按壓數下。
3. 然後把膠紙向下撕去, 藍色保護貼會隨著膠紙一起移走。
內容:避免接觸錶殼內側使用rodico、柳木及麂皮清理
以下的教學因應機芯內罩的版本而有所不同:
內罩的版本,可以由9點位置決定:如果9點有凸出的一點,內罩是舊的版本如果9點沒有凸出的一點,內罩是新的版本請選擇你的內罩版本:
舊款內罩(9點有凸出處)
3c. 安裝錶殼要點安裝錶殼時,須注意以下要點,以避免出現難以維修的情況。內容: 不要觸摸機芯先對準9時,再對準3時盡快達至平整
3d. 安裝錶殼此部分,我們將會把已安裝錶針的組件安裝至錶殼之中。內容:安裝組件對齊機芯及霸芯拆除錶殼教學安裝底蓋最後檢查
新款內罩(9點沒有凸出處)
3d. 安裝錶殼此部分,我們將會把已安裝錶針的組件安裝至錶殼之中。內容:安裝組件對齊機芯及霸芯拆除錶殼教學安裝底蓋最後檢查
如果需要重新安裝可以參考:
拆除教學
安裝完成檢查
嘗試上鏈、調整時間等功能,看看手錶可否正常運作。再次檢查錶針運轉時會不會碰到其他錶針或零件。檢查錶殼水晶、錶針、錶面等零件有沒有塵點或污跡。如有需要可以拆除錶殼清理一下。確認底蓋已穩固地完全鎖上。否則手錶有可能不防水。
View fullsize
只差一步!做得好!你即將可以完成你的DIY 手錶!
前往教學
40 mm
diy-watch-club
USD Rotor Replacement
If you have customized a rotor, follow the instructions below to swap your rotor to a custom one. The installation method would differ depending on the model of the rotor.
Choose the model of your rotor:
Seiko NH35 Rotor
Miyota 8 series rotor
Seiko NH35 RotorSeiko NH35 is one of the mostly commonly used movement and to replace its rotor is easy . Go through this short video to learn how to swap rotor properly:
Next
Miyota 8 Series RotorReplacing the Miyota 8 series rotor with a custom rotor is not difficult at all. You just need to be mindful of some small details .Watch this video to learn how to quickly change the rotor:
Next
Join the conversation!Share your newly modded watch on the DWC forum with the other watch enthusiasts
Join the discussion
40 mm · Otomatik
diy-watch-club
USD Welcome to the DIY Watch Assembly Instruction
In the next two hours, you will dive into the world of watchmaking.Please relax, take your time, and enjoy the fun of the craft of watchmaking!
Quick notes on the Aventurine Tourbillon DIY kitThis is an “Advanced kit” for a reason. Our founder outlines the key important areas to look out for while assembling this watch.
View this post on Instagram A post shared by DIY Watch Club | Watchmaking (@diywatchclub)
Master Tourbillon Series Assembly Instructions
Before starting, you can familiarize yourself with the tools and parts needed:
Parts:watch casebezel insertcrown and stemmovement holderchapter ringdialhandsmovementgasketstrapquick release spring bars (optional depending on strap type)
Tools:tweezersfinger cotshand pumpsuedeRodicoloupecase openerhand removal toolsprotective film for hand removalhand setting toolpeg woodscrewdriver
1: Dial and Movement Assembly Installation
1a. Opening the package and wearing finger cotsIntroduction to what’s inside the package, and how to wear finger cots to protect the movement.Content:introduce package contenthow to wear finger cots, and why
1b. Preparing case partsYour watch case comes pre-assembled in order to keep it clean. This part will show you the individual parts of a case.Content:How to open case backHow to place parts
1c. Movement handling and introduction to tourbillon movementMechanical movement is the soul of a watch. It takes great care to install it, especially a tourbillon movement. In this part, we’ll show you what to be mindful of when you install the movement. Content:Introduction of different parts of a movement and the workings of a tourbillon movementAreas you should not touchAreas you can apply pressure on
1d. Removal of factory stock handsThe movement comes with a set of factory stock hands. We need to remove them before proceeding. These hands will not be used in our assembly so feel free to discard them after the removal.Content:Removal of hands
1e. Removal and installation of stem and crownWatch assembly and basic watch repair require you to install and remove the stem and crown. You will need to do this multiple times throughout this workshop.Content:Function of crownHow to remove and install crownStem release button location
The stem release button for the tourbillon movement is circled in red . Once you can identify it, you can follow the steps in the next instruction video to release the stem and crown.
1f. Installing dialIn this part, we will install the dial. After assembling them, we will proceed to the next part, where we install the movement holder.Content:Install dial onto the movementLearn how to use the locking mechanism
1g. Installing movement holderIn this part, we will install the movement holder. After this, we will proceed to the next part, where we install the watch hands.Content:Identify top and bottom side of the movement holderAlign and install the movement holder
2: Hand Installation and Adjustment
If this is your first time installing hands, it might be quite difficult. You can take a break first before continuing.
Hand installation instruction
back to top
3: Installing Case and Other Parts
3a. Cleaning parts and movement assemblyInstruction on how to clean parts and movement assemblyContent:Using hand pumpUsing rodicoUsing peg wood
3b. Cleaning watch caseIn this part, we will clean the watch caseContent:Avoid touching the inside of caseUsing rodico, peg wood, and suede for cleaning
3c. Stem removalRemoval of the stem with now the dial and hands installed can be slightly challenging.
3d. Installing watch caseThe steps of installing the assembly into the watch case is the same as our Field and Pilot watch. That video covers quite some useful information, so we’ll be referencing that video here.Tourbillon specific tip: your movement holder is quite significantly thinner than the version in the video. You can push the movement holder into the case with the help of the tweezer.
If you need to reinstall any of the components, you can refer to this:
case removal instruction
FINAL CHECK!
Check for proper watch functions by winding and setting time. When hands are being turned, check if they come into contact with other hands or parts.Check for dust or dirt on crystal, hands, dial or other parts. If needed, you can remove the case to clean the inside.Check if the case back is securely fastened. If not, water resistance capability of the watch might be compromised.
Almost there!Good job! You are now one step away from your DIY watch!
Proceed to final instruction
42 mm · Mekanik (kurmalı)
diy-watch-club
USD 歡迎來到DIY Watch Club組裝教學
在未來的兩個多小時,你將會進入手錶的工藝世界。請放鬆心情,慢慢享受手錶工藝的樂趣!
Master Tourbillon手錶安裝教學
開始前,你可以先認識所需的工具及零件:
零件:錶殼錶圈片錶冠及霸芯機芯內罩內圈錶面指針機芯防水膠圈錶帶快拆彈簧杆(視乎錶帶款式)
工具:尖鉗指套氣泵麂皮Rodico放大鏡手錶開蓋器起針器起針保護膠片裝針器柳木螺絲批
1: 錶面及機芯組安裝
1a. 打開套裝及戴上指套簡介套裝內容,及介紹如何戴上指套,以保護機芯。內容:套裝內容簡介如何戴上指套
1b. 準備錶殼零件你的錶殼已事先組裝,以保持清潔。此部分將教導您構成錶殼的各個零件。內容:如何扭開底蓋如何放置零件
1c. 安裝機械機芯注意事項機械機芯是手錶的靈魂,需要小心安裝。這一部分的短片會講解安裝時需要小心注意的事項。內容:機芯部件簡介避免接觸的機芯部分機芯可施力的部分
1d. 移除原裝指針機芯裝有一套原裝指針。在進行下一步組裝之前,我們需要先移除它們。在其後的組裝過程中,我們不會再用上這些指針,所以在移除後,你可以棄置這些指針。內容:如何移除錶針
1e. 安裝霸芯及錶冠組裝手錶及基本手錶維修都需要安裝霸芯及錶冠。整個工作坊內,我們將需要多次進行這個步驟。內容:錶冠功能如何移除及安裝錶冠
霸芯移除按鈕位置移除霸芯的按鈕位於圖中。當你能找到這個按鈕後,你可以跟隨以下影片的方法去移除錶冠和霸芯。
1f. 安裝機芯內罩及錶面這部分,我們將會安裝機芯內罩及錶面。組裝完成後,我們將進入安裝錶針的部分。內容:如何安裝機芯內罩安裝錶面至機芯上
1g. 安裝機芯內罩這部分我們會安裝機芯內罩。其後,我們會進行下一部分的安裝,即是錶針安裝。內容:分辨機芯內罩的上面和底面對準和安裝機芯內罩
2:錶針安裝及調整
首次安裝錶針可能會有點困難。如果需要可以先休息一會再繼續。
錶針安裝教學
回到頁首
3: 安裝錶殼和其他零件
3a. 清理零件及機芯組教導如何清理零件及組件。.內容:使用氣泵使用rodico使用柳木
3b. 清理錶殼此部分,我們將會清理錶殼。內容:避免接觸錶殼內側使用rodico、柳木及麂皮清理
3c. 安裝錶殼此部分,我們將會把已安裝錶針的機芯組安裝至錶殼之中。內容:安裝機芯組對齊機芯及霸芯安裝底蓋
如果需要重新安裝可以參考:
移除教學
最後檢查!
嘗試上鏈、調整時間等功能,以檢查手錶可否正常運作。再次檢查錶針運轉時會不會碰到其他錶針或零件。檢查錶殼水晶、錶針、錶面等零件有沒有塵點或污跡。如有需要可以移除錶殼清理。確認底蓋已穩固地完全鎖上,否則手錶有可能不防水。
只差一步!做得好!你即將可以完成你的DIY 手錶!
前往教學
39 mm
diy-watch-club
USD Welcome to the club!
You can now access your DIY Watchmaking Kit video instructionBefore you begin, please make sure you have:A clean working spaceAmple lightingAnd a relaxed mind
and…
Get your camera ready!
Share your DIY Watch Club creation and building journey on Instagram or Facebook by posting a photo or two. Be sure to use the hashtag #DIYwatchclub and tag us @diywatchclub. If we feature your post on our feed (Stories don’t qualify), we’ll send you a FREE upgrade component.
Let’s get started
Watchmaking starts here
42 mm
diy-watch-club
USD Welcome to the DIY Watch Assembly Instruction
In the next two hours, you will dive into the world of watchmaking.Please relax, take your time, and enjoy the fun of the craft of watchmaking!
Diver 40mm Assembly Instructions
Before starting, you can familiarize yourself with the tools and parts needed:
Parts:watch casebezel insertcrown and stemmovement holderchapter ringdialhandsmovementgasketstrapquick release spring bars (optional depending on strap type)
Tools:tweezersfinger cotshand pumpsuedeRodicoloupecase openerhand removal toolsprotective film for hand removalhand setting toolpeg woodscrewdriver
1: Dial and Movement Assembly Installation
Introduction: how to use mechanical watches with dateThis is a brief introduction to the basics of a mechanical watch with date function, which might prove useful in your subsequent installation. If you are already familiar with how a mechanical watch works, feel free to skip this video and proceed to the next one.Content:crown position for setting datewhen to avoid setting datehow to determine AM/PM
1a. Opening the package and wearing finger cotsIntroduction to what’s inside the package, and how to wear finger cots to protect the movement.Content:introduce package contenthow to wear finger cots, and why
1b. Preparing case partsYour watch case comes pre-assembled in order to keep it clean. This part will show you the individual parts of a case.Content:How to open case backHow to place parts
1c. Precautions during movement installationMechanical movement is the soul of a watch. It takes great care to install it. In this part, we’ll show you what to be mindful of when you install the movement. Content:Introduction of different parts of a movementAreas you should not touchAreas you can apply pressure on
1d. Removal and installation of stem and crownWatch assembly and basic watch repair require you to install and remove the stem and crown. You will need to do this multiple times throughout this workshop.Content:Function of crownHow to remove and install crown
1e. Installing dialPlease choose below the type of dial you’re assembling:
Normal dial, sandwich dial, and skeleton dial (opaque metal)
In this part, we will install the dial. After assembling them, we will proceed to the next part, where we install the watch hands.Content:Install dial onto the movement
Your sandwich dial has a top and bottom layer. Normally they should come assembled in the kit, but if they fall off, you can reassemble them by aligning the feet and hole indicated by the arrows.
The following pictures indicate the movement dial holes (green spot):
View fullsize
NH35 movement
NH70 & NH72 movement
Optional: How to remove the dial
View fullsize
To remove the dial, simply use a screw driver, and insert it in between the dial and the movement or movement holder. Inserting the screw driver next to the dial feet will give you a better control. For Seiko NH movements, you can find slots on the movement holder for this purpose.
Sapphire dial (transparent)
In this part, we will install the sapphire dial. After assembling them, we will proceed to the next part, where we install the watch hands.Content:Install sapphire dial onto the movementLearn how to remove the dial safely
2: Hand Installation and Adjustment
If this is your first time installing hands, it might be quite difficult. You can take a break first before continuing.
Hand installation instruction
back to top
3: Installing Case and Other Parts
[Optional] Bleaching bezel insert
Before installing your case, you can opt to give your bezel insert a faded look by carrying out a process called “bleaching”. Learn how to do it via the button below:
Try bleaching
3a. Cleaning parts and movement assemblyInstruction on how to clean parts and movement assemblyContent:Using hand pumpUsing rodicoUsing peg wood
3b. Cleaning watch caseIn this part, we will clean the watch caseContent:Avoid touching the inside of caseUsing rodico, peg wood, and suede for cleaning
3c. Installing chapter ring and watch caseIn this part, we will install the movement assembly with hands into the caseContent:Installing assemblyAligning movement and stemInstalling case back
3d. (optional) Installing custom rotorIf you have customised a rotor, replace the factory default rotor with your custom rotor.Content:Finding the right screwdriverRemoving the rotorPutting on the new rotorFor Seiko rotor:
3e. (optional) Switching bezels. This video will outline the key steps to remove and install bezels compatible with our 40mm Divers.
If you need to reinstall any of the components, you can refer to this:
case removal instruction
FINAL CHECK!
Check for proper watch functions by winding and setting time. When hands are being turned, check if they come into contact with other hands or parts.Check for dust or dirt on crystal, hands, dial or other parts. If needed, you can remove the case to clean the inside.Check if the case back is securely fastened. If not, water resistance capability of the watch might be compromised.
Almost there!Good job! You are now one step away from your DIY watch!
Proceed to final instruction
40 mm · Otomatik
diy-watch-club
USD You’re almost there!
Just a few more steps and you’re done!
Strap installation and adjustmentChoose the type of your strap:
Parachute strap
other quick release straps and bracelet
Parachute StrapThe parachute strap one of the most comfortable straps out there. But its installation and adjustment differ quite a bit from the ordinary straps. Go through this video to learn how to do it properly:
Next
Quick release strap and braceletStrapsUnlike traditional spring bars, which require specialized tool to install and remove, the quick release spring bar allows you to swap between straps easily and without tools. Go through this video to learn the tips and tricks of installing a quick release strap:
Metal BraceletBracelet comes with double-sided quick release spring bars. The installation is similar to the usual spring bars, only that you’ll be pressing the two handles together at the same time:
Metal Bracelet and Metal Mesh Band AdjustmentMetal BraceletWe offer two types of bracelets: straight pin bracelet and screw pin bracelet. For how to adjust these types of bracelet, please refer to the video below:
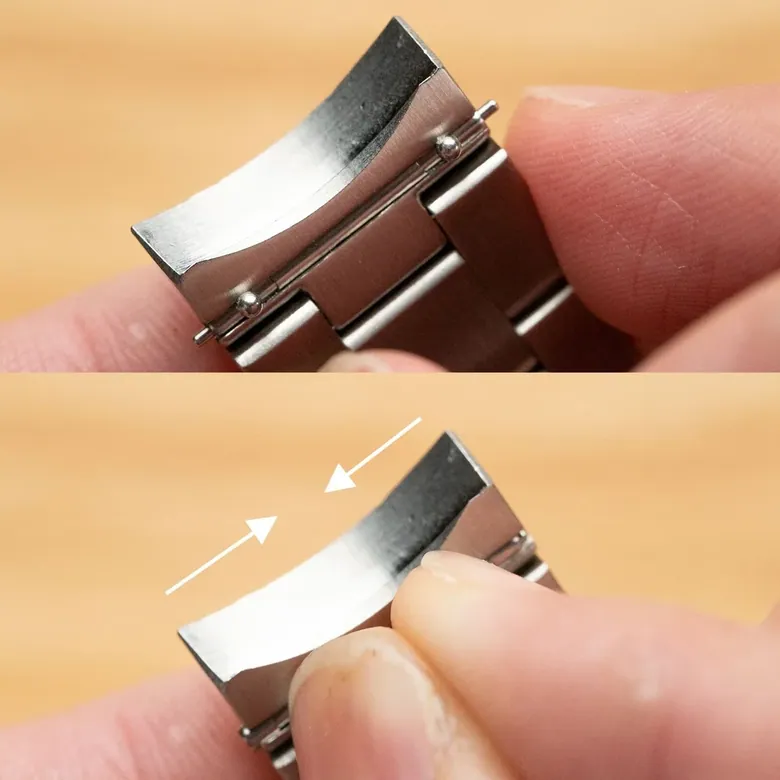
Mesh Band The length of the mesh band is controlled by the clasp on the bottom half of the band. The clasp can be opened by inserting a screwdriver into the slot and using it as a lever. After adjustment, the clasp can be closed simply by hands.
Next
What’s next?You’ve now finished building your own mechanical watch!But this is only the beginning of the journeyLet us take you through the exciting explorations that await you
Let's go
Watch ModDo you know that you can use your watch parts to mod?
Our diver is designed with compatibility with Seiko diver in mind. That means you can use your newly learned watchmaking skills to mod a Seiko diver however you like.Here is a quick tutorial to kick start your watch mod journey:
Next
2. Keep learningThere are more to watchmaking than watch assemblyOur Youtube channel and watchmaking blog are regularly updated with advanced watchmaking tutorials and informative contents, and they are entirely FREECheck out this video on watch regulation:
Subscribe to the Channel
3. Stay in the knowWant to keep honing your watchmaking skills? Join our mailing list to get regular watchmaking articles and free video tutorials! (We promise we won’t spam)
39 mm · Mekanik (kurmalı)
diy-watch-club
USD 時分針安裝及調整
【重要】注意事項:
如你的錶款只有時,分兩針,但是機芯還是有秒針軸的。安裝時請小心不要把秒針軸弄彎,否則可能影響機芯運作。錶針重複安裝可能會導致鬆脫的情況;所以每次安裝時請盡量小心,減少需要重裝的可能性。我們提供了額外1套指針(總共2套)以作後備之用。
View fullsize
2a. 安裝時針和分針
我們將會安裝時針和分針至機芯及錶面之上。內容:如何拿起錶針如何安裝錶針調整錶針的水平和高度
因應不同時分針的構造,分針頂部和分針軸頂部可以容許一定程度的高度差距,只要預留足夠空間安裝秒針,如圖中所示的差距是可以接受的
如果需要拆除錶針重裝可以參考:
錶針移除教學
秒針安裝
警告:此部分的安裝非常困難,不正確安裝可以導致機芯不能維修的損壞!
本人明白危險程度,展開秒針安裝教學
秒針安裝教學
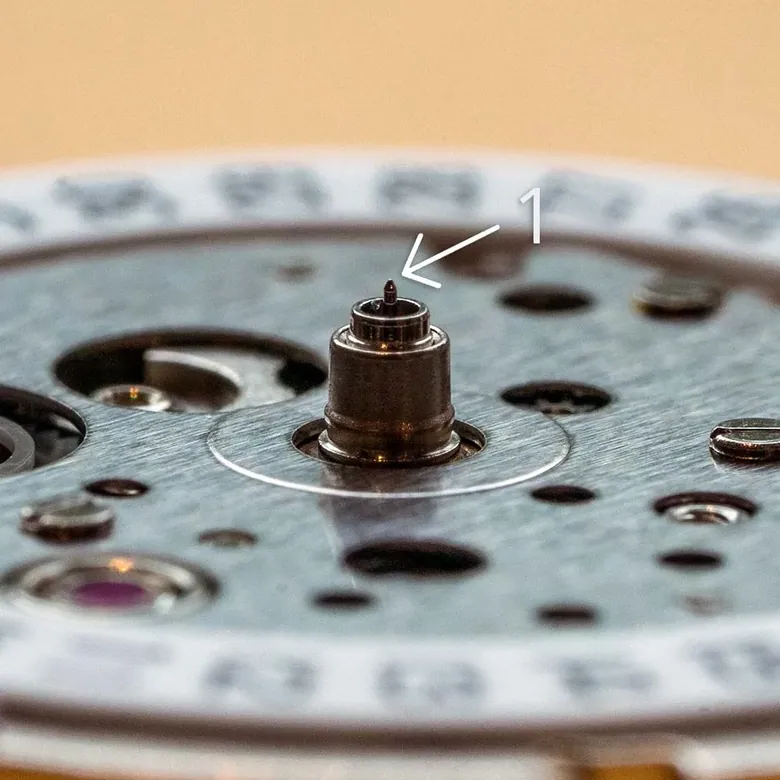
注意事項【重要】 秒針軸較時、分針軸脆弱。安裝需要非常小心。弄彎秒針軸將影響機芯的運作。建議使用放大鏡看清楚秒針軸再嘗試安裝。如果安裝時分針不小心,秒針軸有可能已經彎了。秒針軸彎了以後秒針是安裝不了的。秒針必需跟錶面平行(如果沒有碰到分針的情況下可以稍微向下斜)。安裝及調整安裝高度時記住盡量維持秒針水平。教學短片裏面有詳細的講解;請盡量留意内容。
這是本教學最具挑戰性的部分。我們將會安裝錶針至機芯上。內容:學習正確地安裝秒針的多種方法分辨正確和不正確的秒針安裝
常見問題
這段影片將會講及秒針安裝後,機芯不行走的常見原因
你已完成錶針安裝,可按以下連結回到教學的主部分:
38 mm